Поделиться

Internal CSS code is put in the <head> section
of a particular page. The classes and IDs can be used to refer to the CSS code,
but they are only active on that particular page. CSS styles embedded this way
are downloaded each time the page loads so it may increase loading speed.
However, there are some cases when using internal stylesheet is useful. One example
would be sending someone a page template – as everything is in one page, it is
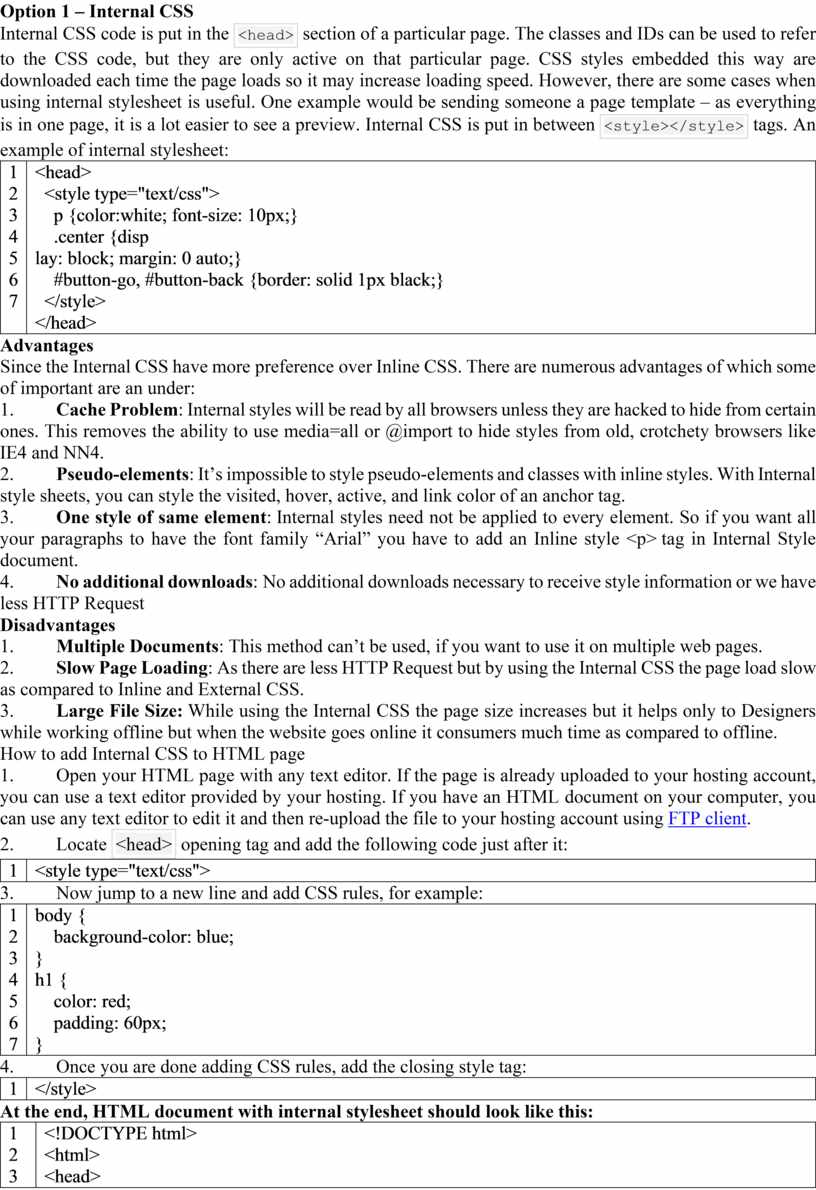
a lot easier to see a preview. Internal CSS is put in between <style></style> tags. An example of internal stylesheet:
|
1 2 3 4 5 6 7 |
<head> <style type="text/css"> p {color:white; font-size: 10px;} .center {disp lay: block; margin: 0 auto;} #button-go, #button-back {border: solid 1px black;} </style> </head> |
Advantages
Since the Internal CSS have more preference over Inline CSS. There are numerous advantages of which some of important are an under:
1. Cache Problem: Internal styles will be read by all browsers unless they are hacked to hide from certain ones. This removes the ability to use media=all or @import to hide styles from old, crotchety browsers like IE4 and NN4.
2. Pseudo-elements: It’s impossible to style pseudo-elements and classes with inline styles. With Internal style sheets, you can style the visited, hover, active, and link color of an anchor tag.
3. One style of same element: Internal styles need not be applied to every element. So if you want all your paragraphs to have the font family “Arial” you have to add an Inline style <p> tag in Internal Style document.
4. No additional downloads: No additional downloads necessary to receive style information or we have less HTTP Request
Disadvantages
1. Multiple Documents: This method can’t be used, if you want to use it on multiple web pages.
2. Slow Page Loading: As there are less HTTP Request but by using the Internal CSS the page load slow as compared to Inline and External CSS.
3. Large File Size: While using the Internal CSS the page size increases but it helps only to Designers while working offline but when the website goes online it consumers much time as compared to offline.
1. Open your HTML page with any text editor. If the page is already uploaded to your hosting account, you can use a text editor provided by your hosting. If you have an HTML document on your computer, you can use any text editor to edit it and then re-upload the file to your hosting account using FTP client.
2.
Locate <head> opening
tag and add the following code just after it:
|
1 |
<style type="text/css"> |
3. Now jump to a new line and add CSS rules, for example:
|
1 2 3 4 5 6 7 |
body { background-color: blue; } h1 { color: red; padding: 60px; } |
4. Once you are done adding CSS rules, add the closing style tag:
|
1 |
</style> |
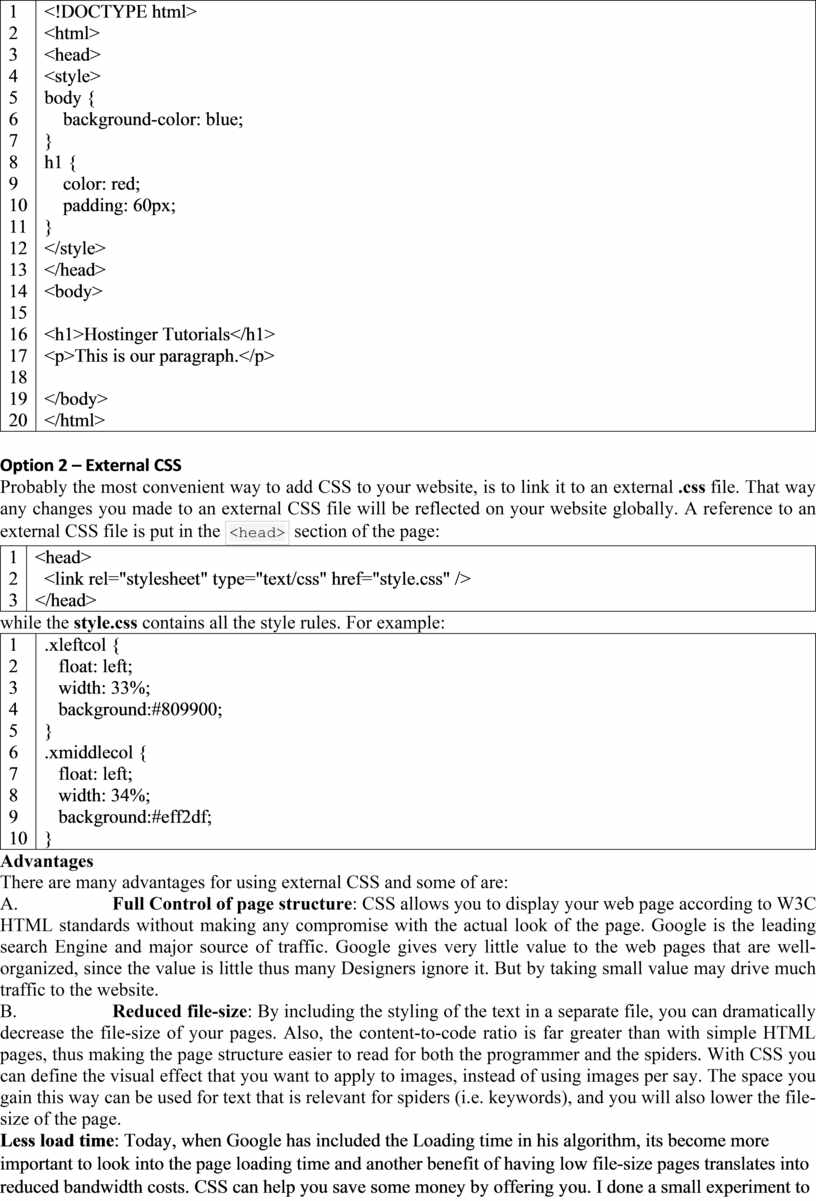
At the end, HTML document with internal stylesheet should look like this:
|
1 2 3 4 5 6 7 8 9 10 11 12 13 14 15 16 17 18 19 20 |
<!DOCTYPE html> <html> <head> <style> body { background-color: blue; } h1 { color: red; padding: 60px; } </style> </head> <body>
<h1>Hostinger Tutorials</h1> <p>This is our paragraph.</p>
</body> </html> |
Option 2 – External CSS
Probably the most convenient way to add CSS to your website, is to
link it to an external .css file. That way any
changes you made to an external CSS file will be reflected on your website
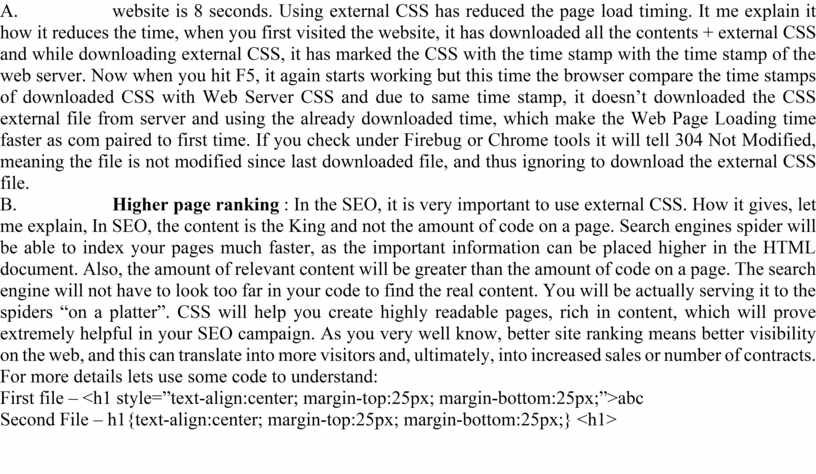
globally. A reference to an external CSS file is put in the <head> section
of the page:
|
1 2 3 |
<head> <link rel="stylesheet" type="text/css" href="style.css" /> </head> |
while the style.css contains all the style rules. For example:
|
1 2 3 4 5 6 7 8 9 10 |
.xleftcol { float: left; width: 33%; background:#809900; } .xmiddlecol { float: left; width: 34%; background:#eff2df; } |
Advantages
There are many advantages for using external CSS and some of are:
A. Full Control of page structure: CSS allows you to display your web page according to W3C HTML standards without making any compromise with the actual look of the page. Google is the leading search Engine and major source of traffic. Google gives very little value to the web pages that are well-organized, since the value is little thus many Designers ignore it. But by taking small value may drive much traffic to the website.
B. Reduced file-size: By including the styling of the text in a separate file, you can dramatically decrease the file-size of your pages. Also, the content-to-code ratio is far greater than with simple HTML pages, thus making the page structure easier to read for both the programmer and the spiders. With CSS you can define the visual effect that you want to apply to images, instead of using images per say. The space you gain this way can be used for text that is relevant for spiders (i.e. keywords), and you will also lower the file-size of the page.
C. Less load time: Today, when Google has included the Loading time in his algorithm, its become more important to look into the page loading time and another benefit of having low file-size pages translates into reduced bandwidth costs. CSS can help you save some money by offering you. I done a small experiment to check the page load time. I am using the Mobile Internet Connection for testing and for that first I cleared the web cache of the website and visited http://lawmirror.comfor first time after clearing cache. The total time taken to load the website is 16 seconds. Now I hit the F5 button and the time taken to load the website is 8 seconds. Using external CSS has reduced the page load timing. It me explain it how it reduces the time, when you first visited the website, it has downloaded all the contents + external CSS and while downloading external CSS, it has marked the CSS with the time stamp with the time stamp of the web server. Now when you hit F5, it again starts working but this time the browser compare the time stamps of downloaded CSS with Web Server CSS and due to same time stamp, it doesn’t downloaded the CSS external file from server and using the already downloaded time, which make the Web Page Loading time faster as com paired to first time. If you check under Firebug or Chrome tools it will tell 304 Not Modified, meaning the file is not modified since last downloaded file, and thus ignoring to download the external CSS file.
D. Higher page ranking : In the SEO, it is very important to use external CSS. How it gives, let me explain, In SEO, the content is the King and not the amount of code on a page. Search engines spider will be able to index your pages much faster, as the important information can be placed higher in the HTML document. Also, the amount of relevant content will be greater than the amount of code on a page. The search engine will not have to look too far in your code to find the real content. You will be actually serving it to the spiders “on a platter”. CSS will help you create highly readable pages, rich in content, which will prove extremely helpful in your SEO campaign. As you very well know, better site ranking means better visibility on the web, and this can translate into more visitors and, ultimately, into increased sales or number of contracts. For more details lets use some code to understand:
First file – <h1 style=”text-align:center; margin-top:25px; margin-bottom:25px;”>abc
Second File – h1{text-align:center; margin-top:25px; margin-bottom:25px;} <h1>
Inline CSS is used for a specific HTML tag. <style> attribute
is used to style a particular HTML tag. Using CSS this way is not recommended,
as each HTML tag needs to be styled individually. Managing your website may
become too hard if you only use inline CSS. However, it can be useful in some
situations. For example, in cases when you don’t have an access to CSS files or
need to apply style for a single element only. An example of HTML page with
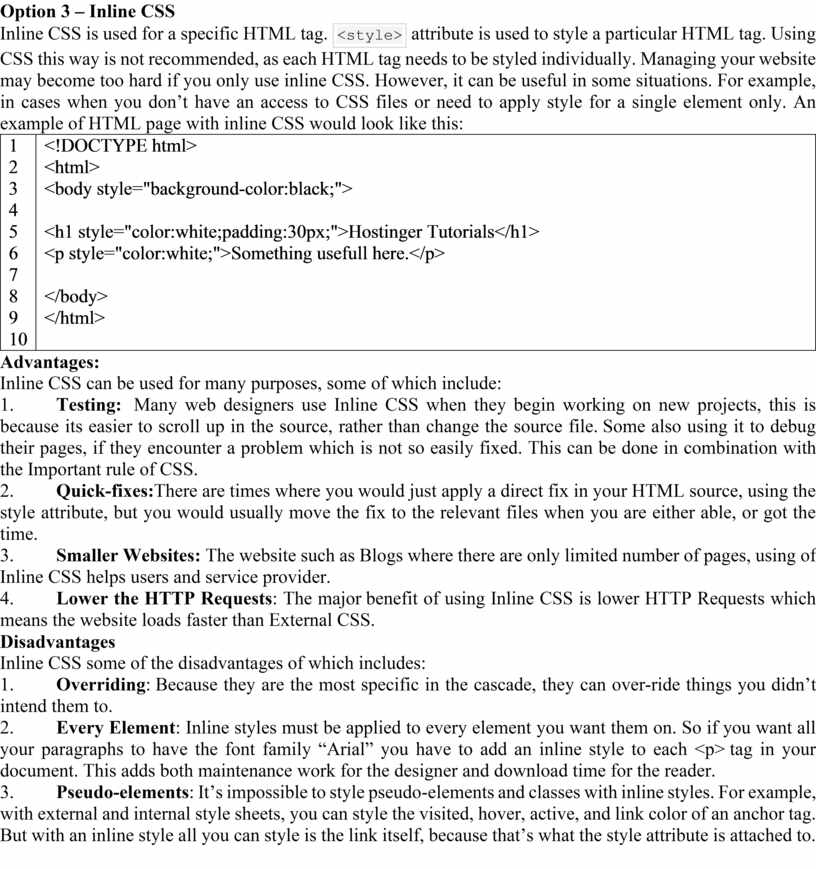
inline CSS would look like this:
|
1 2 3 4 5 6 7 8 9 10 |
<!DOCTYPE html> <html> <body style="background-color:black;">
<h1 style="color:white;padding:30px;">Hostinger Tutorials</h1> <p style="color:white;">Something usefull here.</p>
</body> </html>
|
Advantages:
Inline CSS can be used for many purposes, some of which include:
1. Testing: Many web designers use Inline CSS when they begin working on new projects, this is because its easier to scroll up in the source, rather than change the source file. Some also using it to debug their pages, if they encounter a problem which is not so easily fixed. This can be done in combination with the Important rule of CSS.
2. Quick-fixes:There are times where you would just apply a direct fix in your HTML source, using the style attribute, but you would usually move the fix to the relevant files when you are either able, or got the time.
3. Smaller Websites: The website such as Blogs where there are only limited number of pages, using of Inline CSS helps users and service provider.
4. Lower the HTTP Requests: The major benefit of using Inline CSS is lower HTTP Requests which means the website loads faster than External CSS.
Disadvantages
Inline CSS some of the disadvantages of which includes:
1. Overriding: Because they are the most specific in the cascade, they can over-ride things you didn’t intend them to.
2. Every Element: Inline styles must be applied to every element you want them on. So if you want all your paragraphs to have the font family “Arial” you have to add an inline style to each <p> tag in your document. This adds both maintenance work for the designer and download time for the reader.
3. Pseudo-elements: It’s impossible to style pseudo-elements and classes with inline styles. For example, with external and internal style sheets, you can style the visited, hover, active, and link color of an anchor tag. But with an inline style all you can style is the link itself, because that’s what the style attribute is attached to.
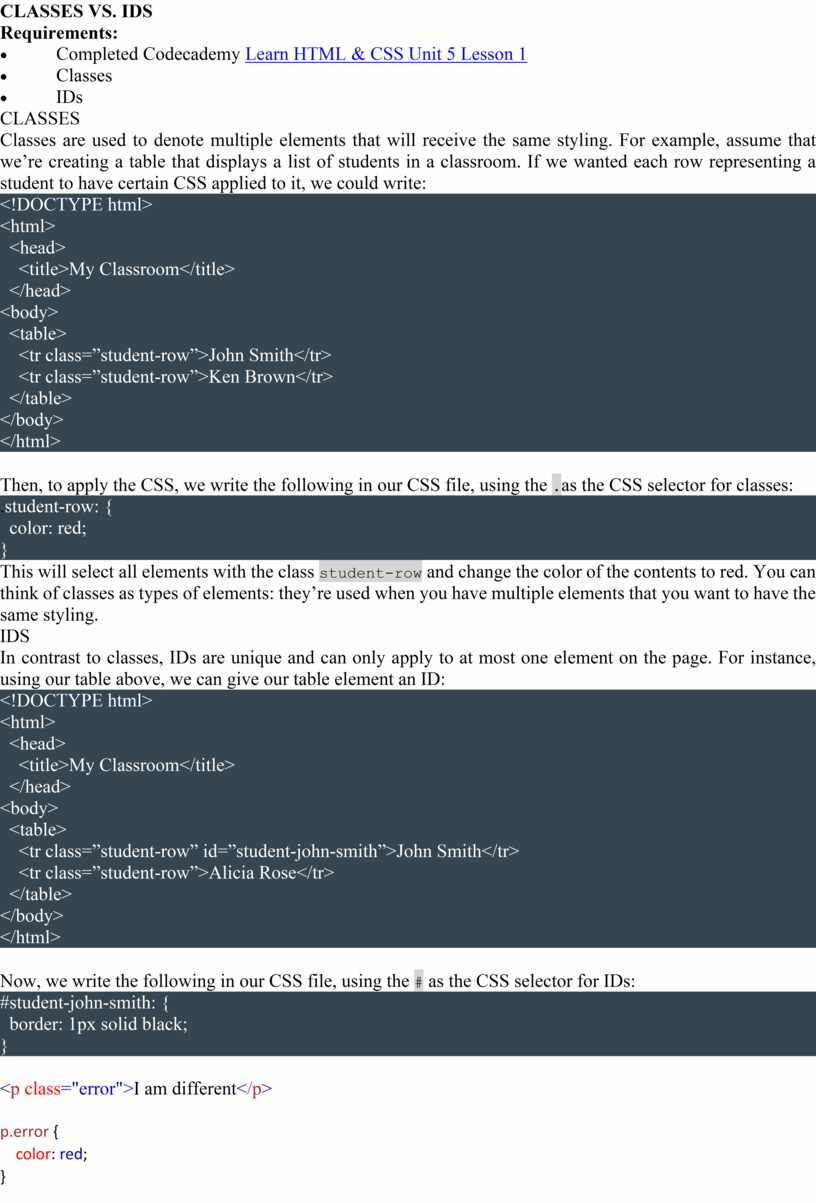
Requirements:
· Completed Codecademy Learn HTML & CSS Unit 5 Lesson 1
· Classes
· IDs
Classes are used to denote multiple elements that will receive the same styling. For example, assume that we’re creating a table that displays a list of students in a classroom. If we wanted each row representing a student to have certain CSS applied to it, we could write:
<!DOCTYPE html><html> <head> <title>My Classroom</title> </head><body> <table> <tr class=”student-row”>John Smith</tr> <tr class=”student-row”>Ken Brown</tr> </table></body></html> Then, to apply the CSS, we write the
following in our CSS file, using the .as
the CSS selector for classes:
.student-row: {
color: red;}
This will select all elements with
the class student-row and
change the color of the contents to red. You can think of classes as types of
elements: they’re used when you have multiple elements that you want to have
the same styling.
In contrast to classes, IDs are unique and can only apply to at most one element on the page. For instance, using our table above, we can give our table element an ID:
<!DOCTYPE html><html> <head> <title>My Classroom</title> </head><body> <table> <tr class=”student-row” id=”student-john-smith”>John Smith</tr> <tr class=”student-row”>Alicia Rose</tr> </table></body></html> Now, we write the following in our
CSS file, using the # as
the CSS selector for IDs:
#student-john-smith: {
border: 1px solid black;
} <p class="error">I am different</p>
p.error {
color: red;
}
Скачано с www.znanio.ru
Материалы на данной страницы взяты из открытых источников либо размещены пользователем в соответствии с договором-офертой сайта. Вы можете сообщить о нарушении.