Поделиться
Drawing and coloring.
Coloring black and white photos
Students should know:
Students should be able to:
Drawing and coloring
Brushes
Many tools in the program work like a pencil. Working with them, you drag the cursor over the image, as if drawing on paper. Streaks appear on the image. While drawing a stroke, you build along the path of the cursor movement a chain of identical elements that are close (or not very close) to each other. This element is the brush. The brush is defined for any painting tool and is a very important property.
Tools that use a working color for a stroke include the Brush and Pencil. Using their example, we will get acquainted with the work of drawing tools.
In some cases, Fill, Gradient, Eyedropper and Stain are considered to be painting tools as well.
Foreground color (or main) is used for painting, filling selected areas, and also as the starting color of the gradient.
Background color(or background) can be compared to the color of the canvas on which the paint is applied. It is this color that appears when removing the pixels of the image (after removing the paint, the canvas is visible). In addition, the background color is used to complete the gradient.
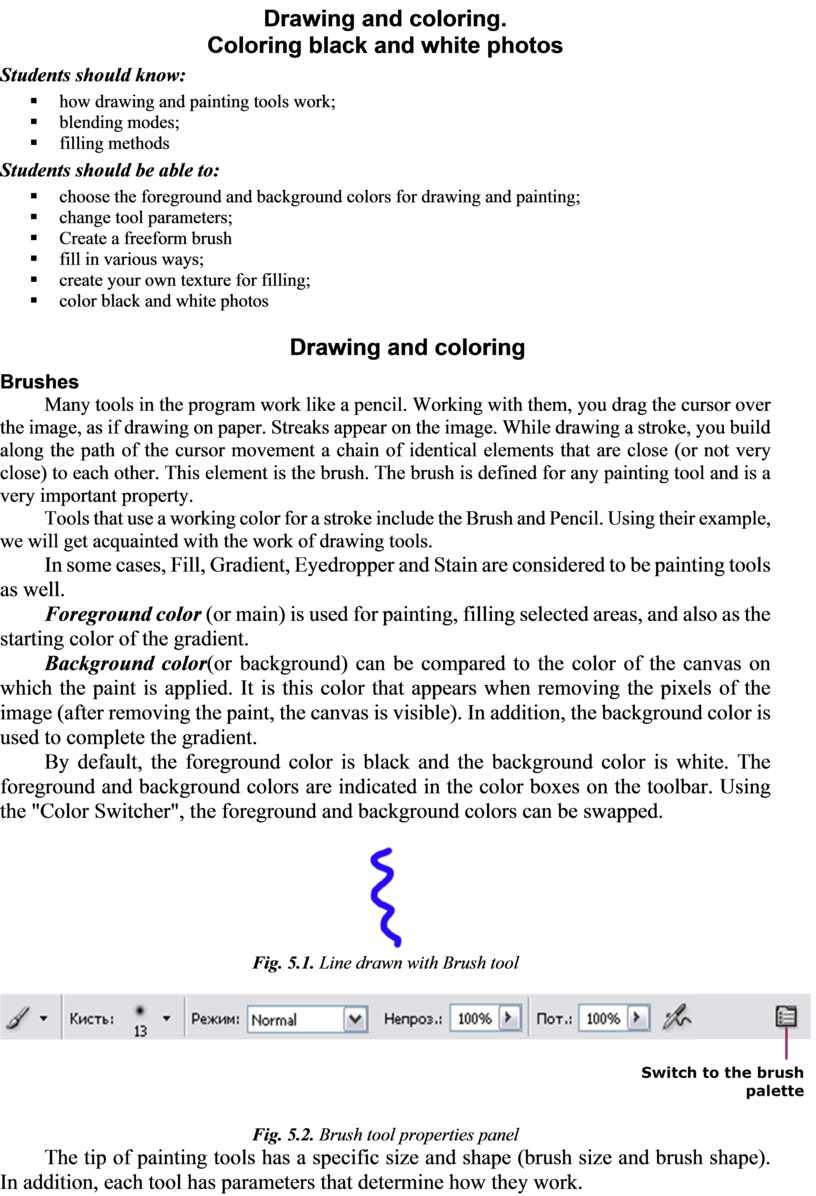
By default, the foreground color is black and the background color is white. The foreground and background colors are indicated in the color boxes on the toolbar. Using the "Color Switcher", the foreground and background colors can be swapped.

Fig. 5.1. Line drawn with Brush tool

Fig. 5.2. Brush tool properties panel
The tip of painting tools has a specific size and shape (brush size and brush shape). In addition, each tool has parameters that determine how they work.
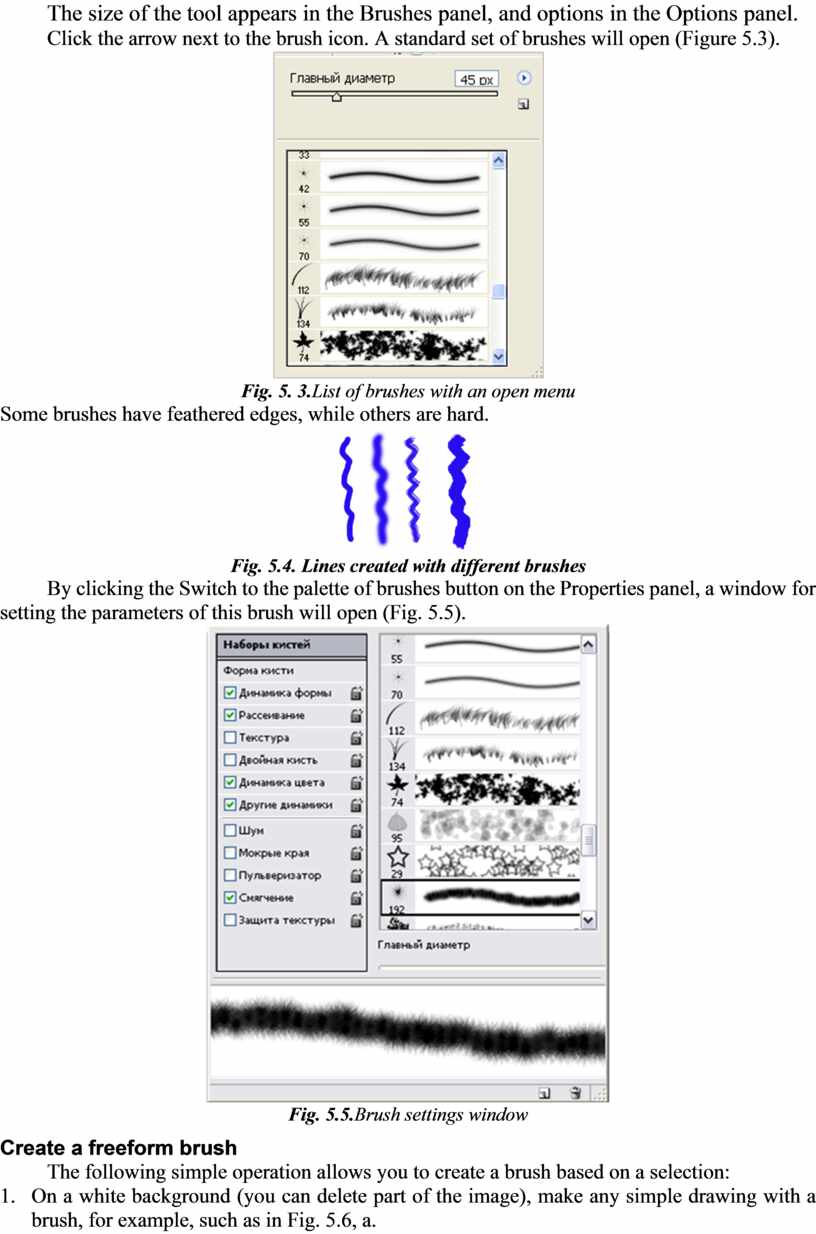
The size of the tool appears in the Brushes panel, and options in the Options panel.
Click the arrow next to the brush icon. A standard set of brushes will open (Figure 5.3).

Fig. 5. 3.List of brushes with an open menu
Some brushes have feathered edges, while others are hard.
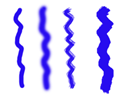
Fig. 5.4. Lines created with different brushes
By clicking the Switch to the palette of brushes button on the Properties panel, a window for setting the parameters of this brush will open (Fig. 5.5).
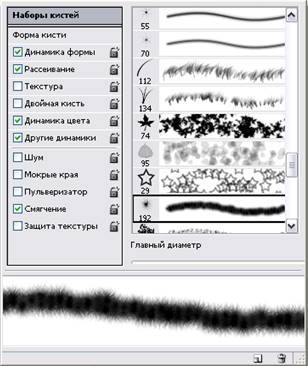
Fig. 5.5.Brush settings window
Create a freeform brush
The following simple operation allows you to create a brush based on a selection:
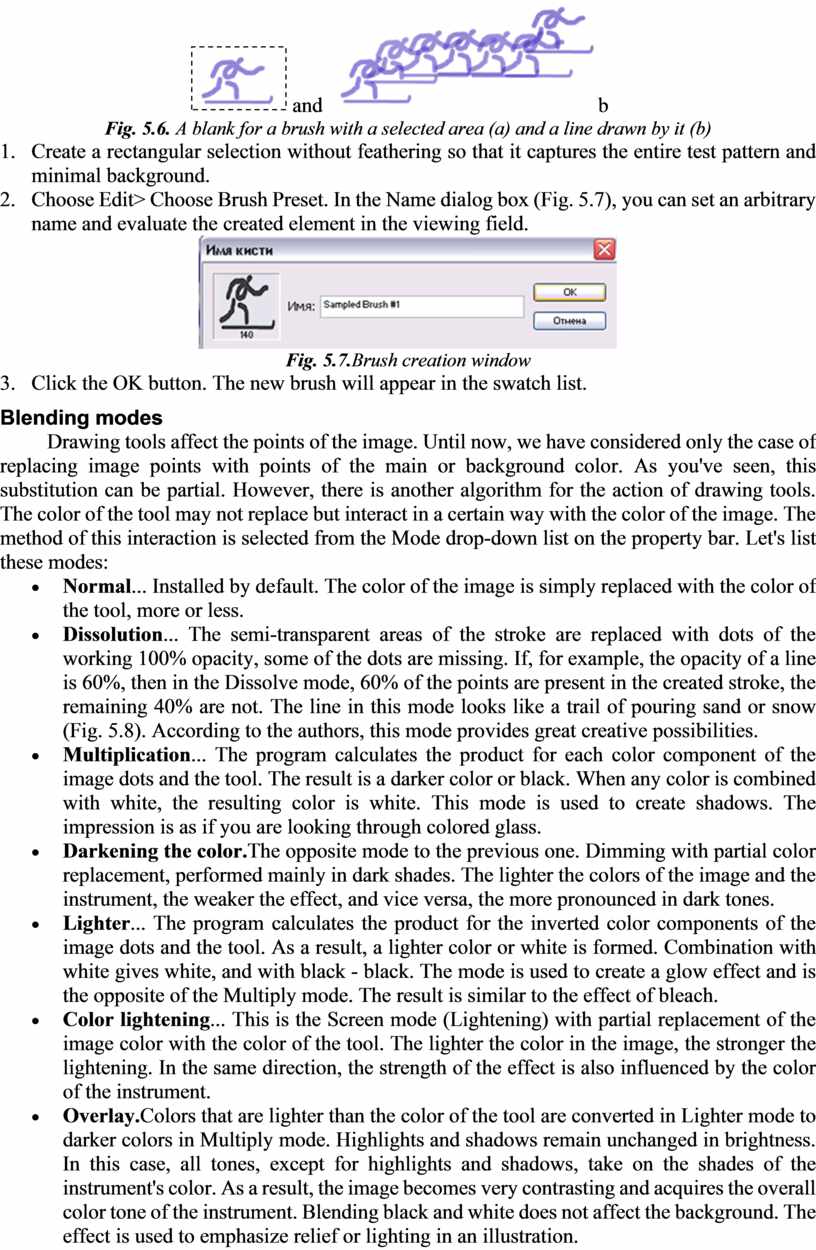
1. On a white background (you can delete part of the image), make any simple drawing with a brush, for example, such as in Fig. 5.6, a.
 and
and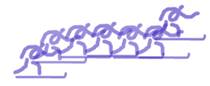 b
b
Fig. 5.6. A blank for a brush with a selected area (a) and a line drawn by it (b)
2. Create a rectangular selection without feathering so that it captures the entire test pattern and minimal background.
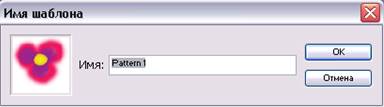
3. Choose Edit> Choose Brush Preset. In the Name dialog box (Fig. 5.7), you can set an arbitrary name and evaluate the created element in the viewing field.
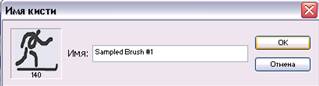
Fig. 5.7.Brush creation window
4. Click the OK button. The new brush will appear in the swatch list.
Blending modes
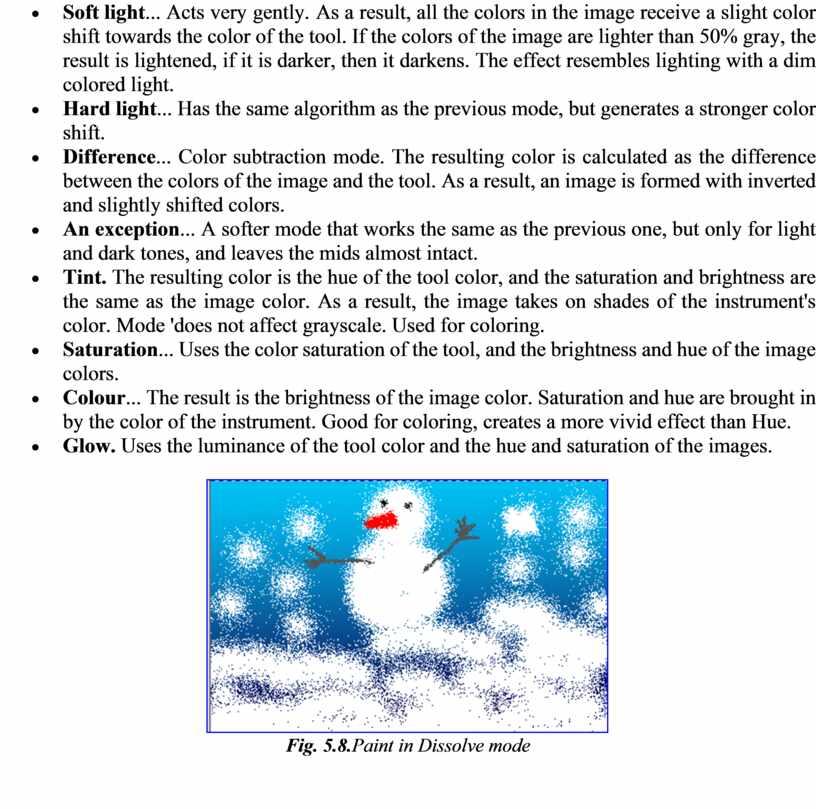
Drawing tools affect the points of the image. Until now, we have considered only the case of replacing image points with points of the main or background color. As you've seen, this substitution can be partial. However, there is another algorithm for the action of drawing tools. The color of the tool may not replace but interact in a certain way with the color of the image. The method of this interaction is selected from the Mode drop-down list on the property bar. Let's list these modes:
Fig. 5.8.Paint in Dissolve mode
Fill command and tool
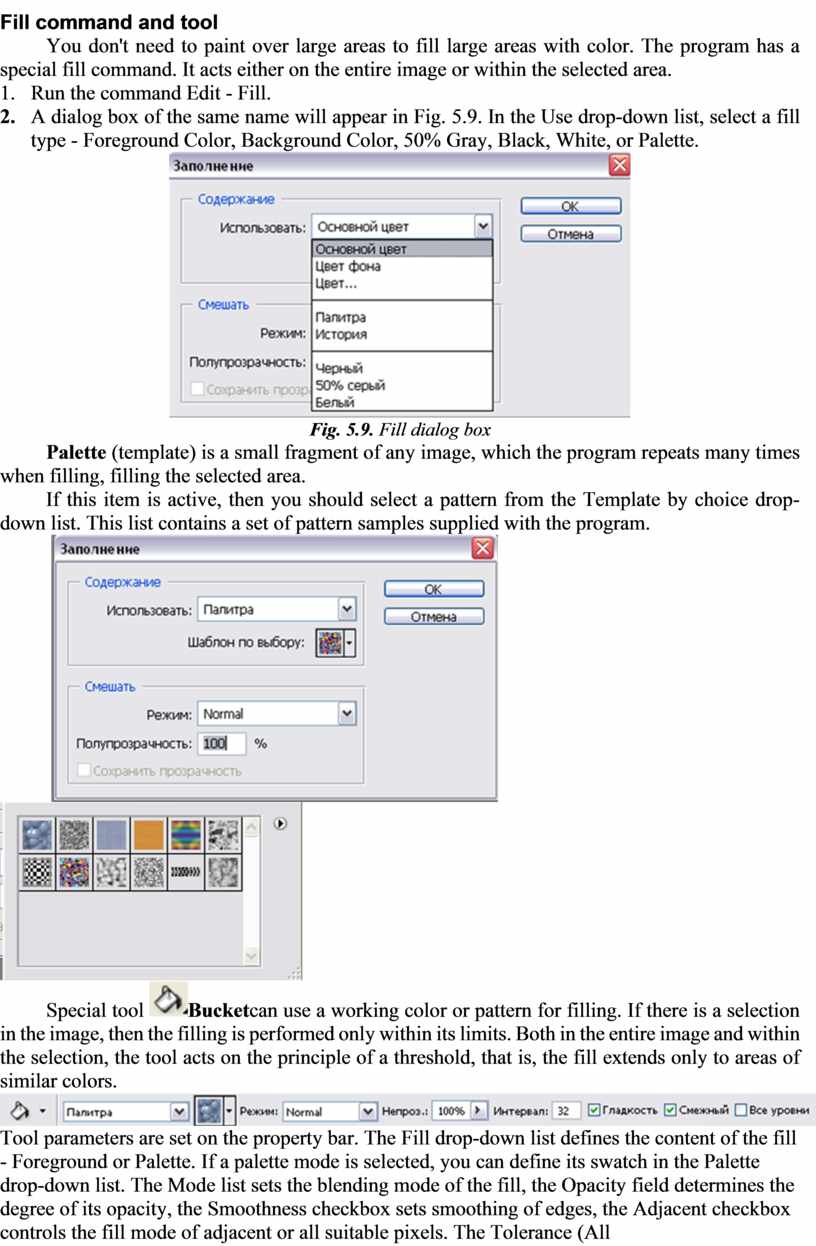
You don't need to paint over large areas to fill large areas with color. The program has a special fill command. It acts either on the entire image or within the selected area.
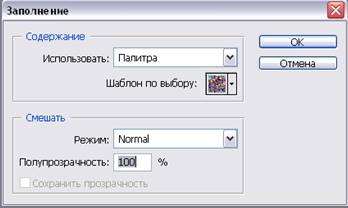
1. Run the command Edit - Fill.
2. A dialog box of the same name will appear in Fig. 5.9. In the Use drop-down list, select a fill type - Foreground Color, Background Color, 50% Gray, Black, White, or Palette.
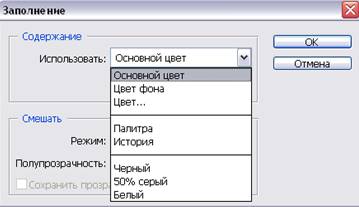
Fig. 5.9. Fill dialog box
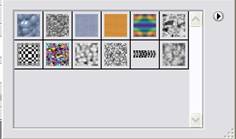
Palette (template) is a small fragment of any image, which the program repeats many times when filling, filling the selected area.
If this item is active, then you should select a pattern from the Template by choice drop-down list. This list contains a set of pattern samples supplied with the program.
Special tool ![]() Bucketcan
use a working color or pattern for filling. If there is a selection in the
image, then the filling is performed only within its limits. Both in the entire
image and within the selection, the tool acts on the principle of a threshold,
that is, the fill extends only to areas of similar colors.
Bucketcan
use a working color or pattern for filling. If there is a selection in the
image, then the filling is performed only within its limits. Both in the entire
image and within the selection, the tool acts on the principle of a threshold,
that is, the fill extends only to areas of similar colors.
![]()
Tool parameters are set on the property bar. The Fill drop-down list defines the content of the fill - Foreground or Palette. If a palette mode is selected, you can define its swatch in the Palette drop-down list. The Mode list sets the blending mode of the fill, the Opacity field determines the degree of its opacity, the Smoothness checkbox sets smoothing of edges, the Adjacent checkbox controls the fill mode of adjacent or all suitable pixels. The Tolerance (All Levels) parameter determines the threshold for the proximity of the colors that the instrument affects. The higher this value, and the more extensive the fill area, the more shades the program considers close to the color at the click point.
Texture creation
The program includes several patterns. Of course, these samples may not suit your needs. But the pattern is easy to design yourself.
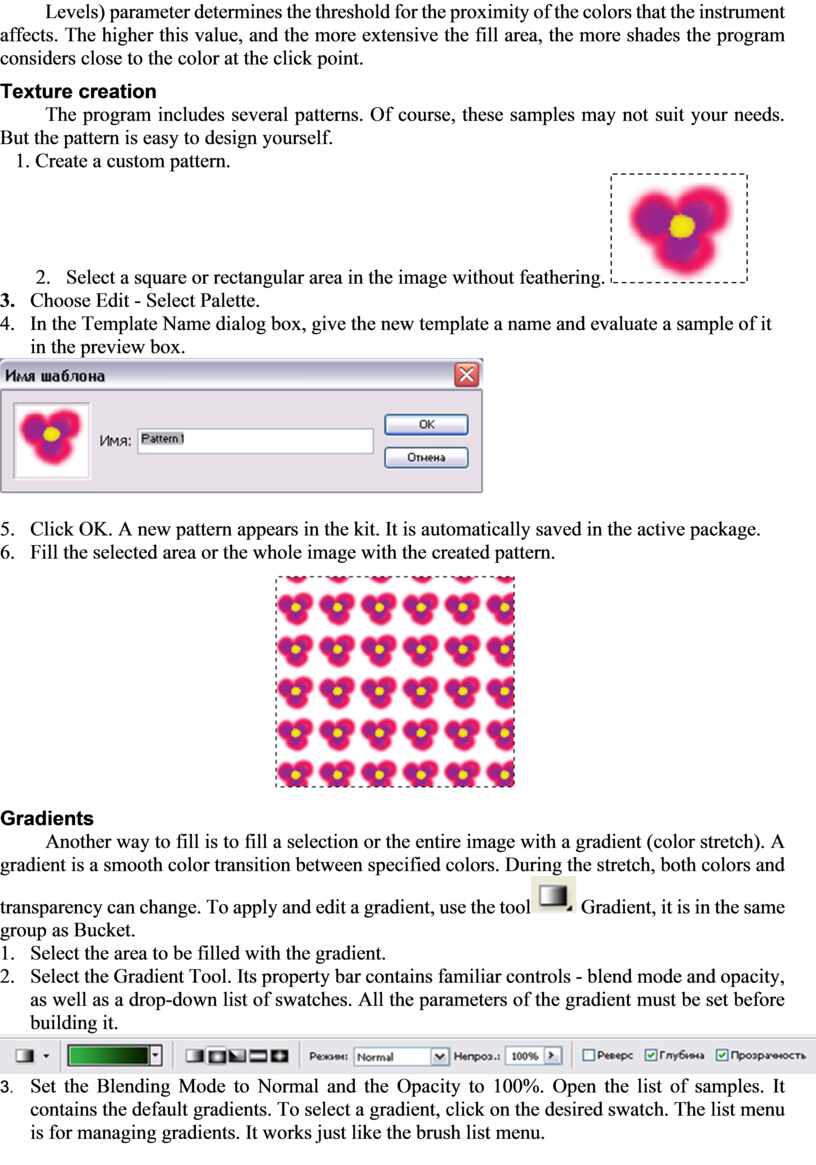
1. Create a custom pattern.
2. Select
a square or rectangular area in the image without feathering. 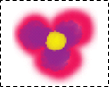
3. Choose Edit - Select Palette.
4. In the Template Name dialog box, give the new template a name and evaluate a sample of it in the preview box.
5. Click OK. A new pattern appears in the kit. It is automatically saved in the active package.
6. Fill the selected area or the whole image with the created pattern.
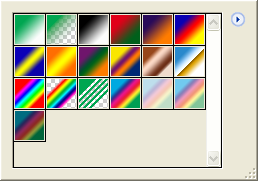
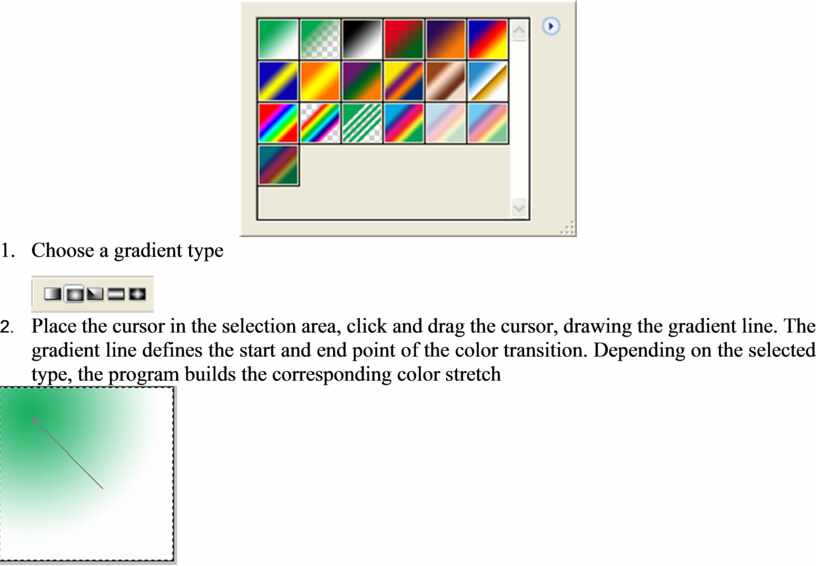
Gradients
Another way to fill is to fill
a selection or the entire image with a gradient (color stretch). A gradient is
a smooth color transition between specified colors. During the stretch, both
colors and transparency can change. To apply and edit a gradient, use the tool![]() Gradient, it is in the same group as Bucket.
Gradient, it is in the same group as Bucket.
1. Select the area to be filled with the gradient.
2. Select the Gradient Tool. Its property bar contains familiar controls - blend mode and opacity, as well as a drop-down list of swatches. All the parameters of the gradient must be set before building it.
![]()
3. Set the Blending Mode to Normal and the Opacity to 100%. Open the list of samples. It contains the default gradients. To select a gradient, click on the desired swatch. The list menu is for managing gradients. It works just like the brush list menu.
4. Choose a gradient type
5.

Материалы на данной страницы взяты из открытых источников либо размещены пользователем в соответствии с договором-офертой сайта. Вы можете сообщить о нарушении.