Поделиться

The point of the Query-By-Example editor is to make it simple to create queries in MS Access. What actually happens is that MS Access converts the Query-By-Exampleobjects into SQL. Wouldn’t it be great if you could see the generated SQL? You bet it would!
To view the SQL code:
Select SQL view.
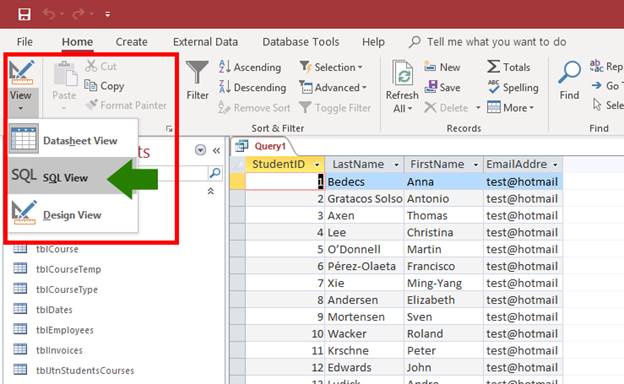
Figure 4
The generated SQL code is shown and reads:
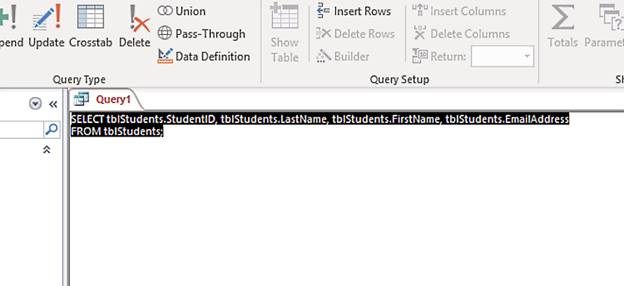
Figure 5
The Query-By-Example editor can be used instead of writing pure SQL which is both more convenient and a useful learning tool.
Let’s summarise some of the details of the SQL statement in Figure 5.
In the above example, we began with the query in design mode. We then constructed a query using Query-By-Example before viewing the query as pure SQL. Let’s see what happens if we modify a pure SQL query and then view it using the Query-By-Example editor.
Using the pure SQL from Figure 5:
Place the cursor in the Query text between the tblStudents.EmailAddress field and the FROM keyword. Delete the tblStudents.EmailAddress field and the preceding comma. Your query should now look like this:
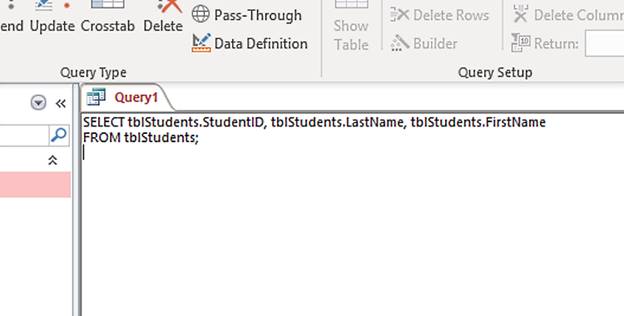
Figure 6
If you now switch to design view (View > Design View) you will see that the tblStudents.EmailAddress field has been removed from the Query Grid.
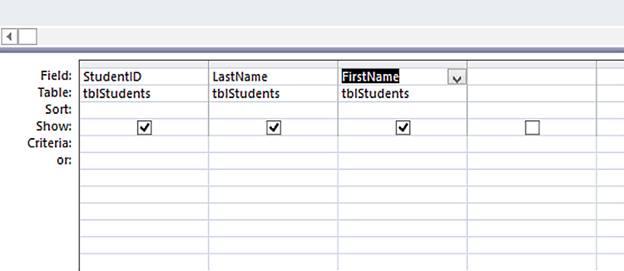
Figure 7
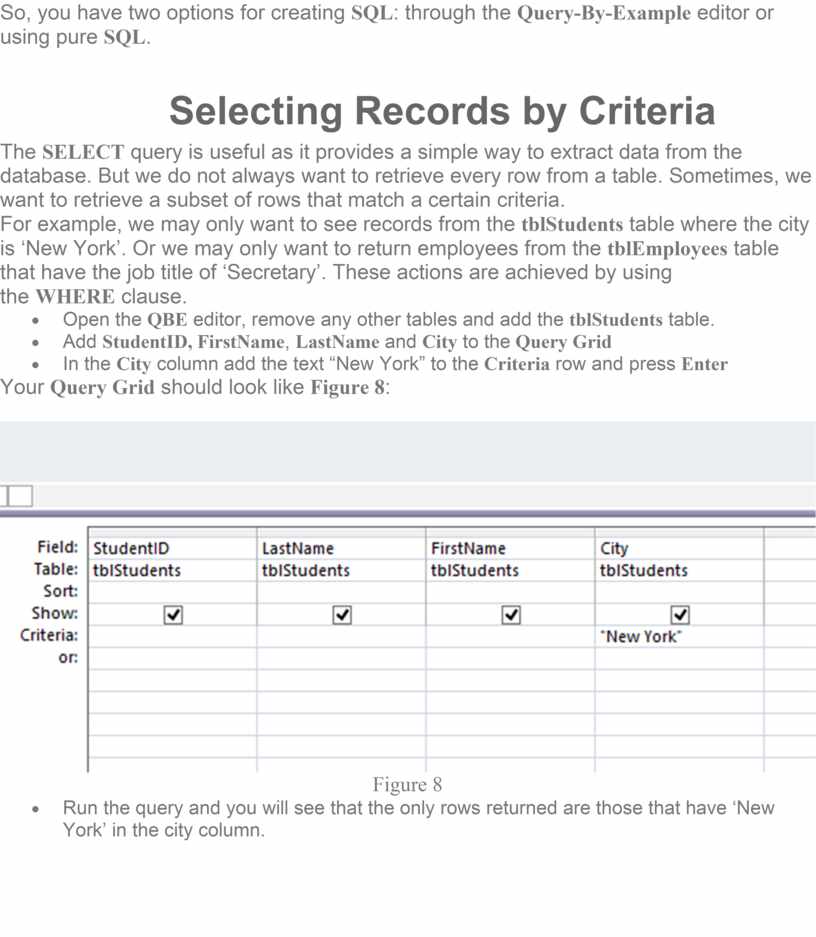
So, you have two options for creating SQL: through the Query-By-Example editor or using pure SQL.
The SELECT query is useful as it provides a simple way to extract data from the database. But we do not always want to retrieve every row from a table. Sometimes, we want to retrieve a subset of rows that match a certain criteria.
For example, we may only want to see records from the tblStudents table where the city is ‘New York’. Or we may only want to return employees from the tblEmployees table that have the job title of ‘Secretary’. These actions are achieved by using the WHERE clause.
Your Query Grid should look like Figure 8:
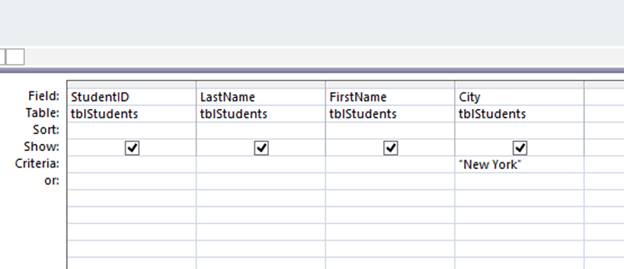
Figure 8

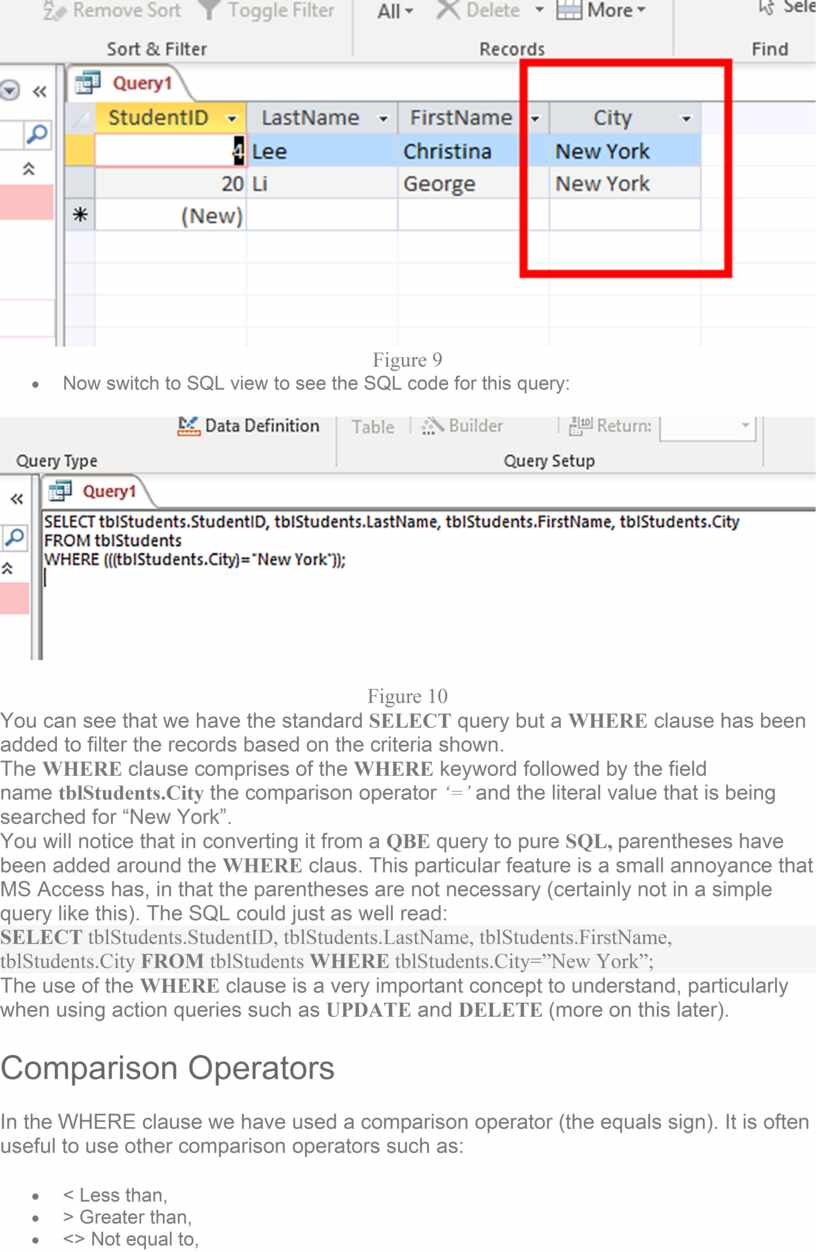
Figure 9
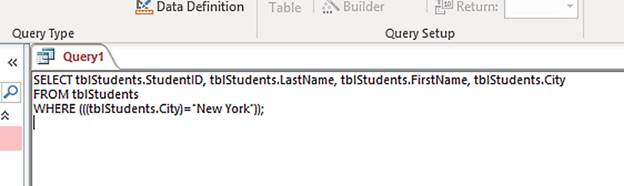
Figure 10
You can see that we have the standard SELECT query but a WHERE clause has been added to filter the records based on the criteria shown.
The WHERE clause comprises of the WHERE keyword followed by the field name tblStudents.City the comparison operator ‘=’ and the literal value that is being searched for “New York”.
You will notice that in converting it from a QBE query to pure SQL, parentheses have been added around the WHERE claus. This particular feature is a small annoyance that MS Access has, in that the parentheses are not necessary (certainly not in a simple query like this). The SQL could just as well read:
SELECT tblStudents.StudentID, tblStudents.LastName, tblStudents.FirstName, tblStudents.City FROM tblStudents WHERE tblStudents.City=”New York”;
The use of the WHERE clause is a very important concept to understand, particularly when using action queries such as UPDATE and DELETE (more on this later).
In the WHERE clause we have used a comparison operator (the equals sign). It is often useful to use other comparison operators such as:
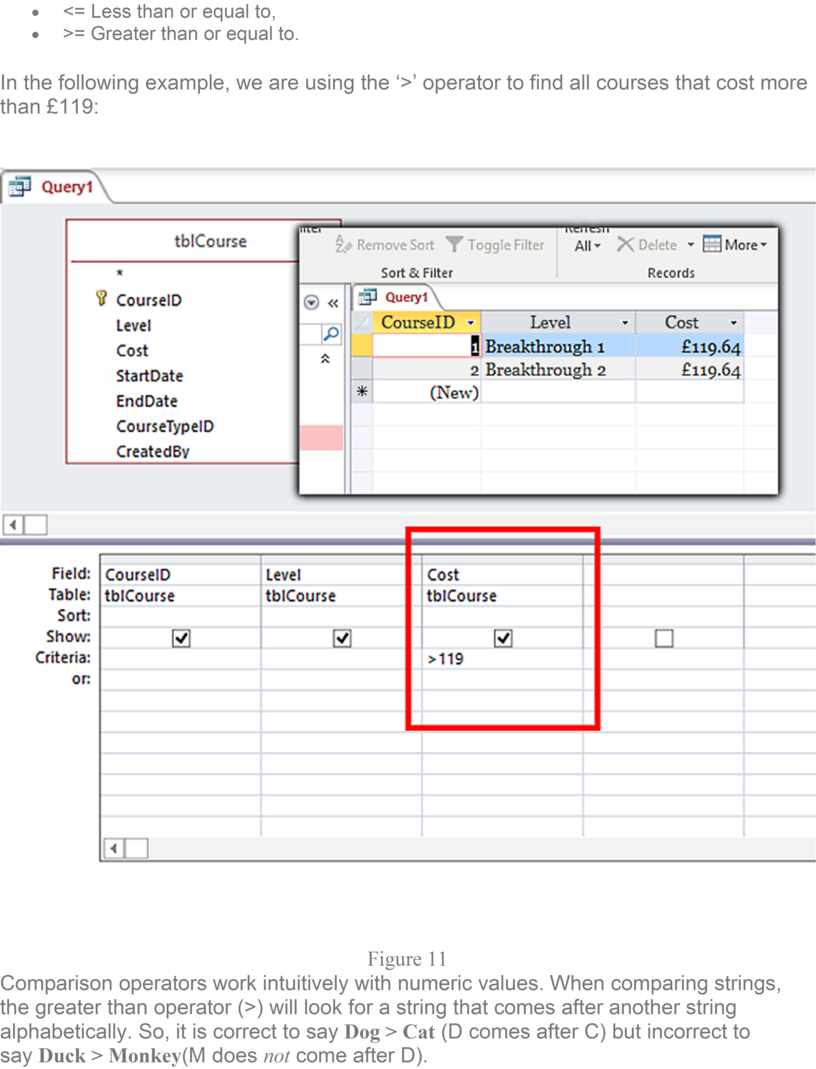
In the following example, we are using the ‘>’ operator to find all courses that cost more than £119:
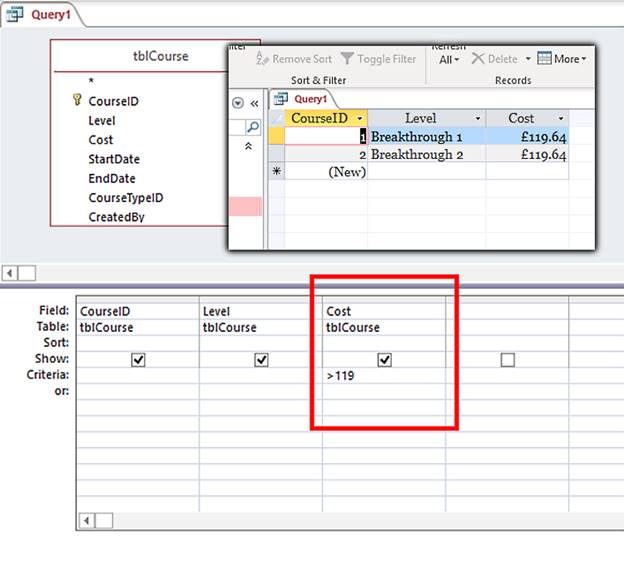
Figure 11
Comparison operators work intuitively with numeric values. When comparing strings, the greater than operator (>) will look for a string that comes after another string alphabetically. So, it is correct to say Dog > Cat (D comes after C) but incorrect to say Duck > Monkey(M does not come after D).
Скачано с www.znanio.ru

Материалы на данной страницы взяты из открытых источников либо размещены пользователем в соответствии с договором-офертой сайта. Вы можете сообщить о нарушении.