Поделиться
Lesson plan
|
Long-term plan unit:Magnetic field |
School: |
||||||
|
Date: |
Teacher name: |
||||||
|
Grade: 10 |
Number present: |
Absent: |
|||||
|
Theme of the lesson |
Interaction between the conductor and current, Ampere’s experiments. |
||||||
|
Learning objectives that are achieved at this lesson (Subject Programme reference) |
· To explain the physical meaning of magnetic induction vector based on problem solving and modern technological advances (magnetic levitation train, etc.) |
||||||
|
Lesson objectives |
By the end of this lesson, students will be able to: Describe the effects of the magnetic force between two conductors; Know that the size of the force also depends on the size of the magnetic field; Conclude that currents in the same direction attract each other, currents in opposite directions repel each other; |
||||||
|
Assessment criteria |
Knowledge Know that the size of the force also depends on the size of the magnetic field; Application Can set up apparatus then observe the attraction and repulsion between two parallel currents; Analysis Describe the effects of the magnetic force between two conductors; Synthesis Conclude that currents in the same direction attract each other, currents in opposite directions repel each other; Evaluation Appreciate that a force might act on a current-carrying conductor placed in a magnetic field; |
||||||
|
Language objectives
|
Subject-specific vocabulary & terminology magnetic field direction magnetic force current Useful set(s) of phrases for dialogue/writing Currents in the same direction attract each other, currents in opposite directions repel each other. |
||||||
|
Type of differentiation |
Differentiated poster-session , Collaborative Learning, Progressive Task with Digital resources |
||||||
|
Values instilled at the lesson
|
Safety, Consideration to others, Co-operation, Opportunity for Life-Long Learning, Academic Integrity and Transparency, Respect for Self and Others |
||||||
|
Cross-curricular links |
· Chemistry: atom model · Mathematics: measure the angles |
||||||
|
ICT skills |
Research skills, use of video as introduction |
||||||
|
Previous learning |
Grade 8: magnetic fields; representation of fields by field lines; fields of permanent magnets Grade 8: electrical equations: V = IR, P = IV |
||||||
|
Course of the lesson |
|||||||
|
Planned stages of the lesson |
Planned activities at the lesson |
Resources |
|||||
|
Beginning (0-3 min)
(4-10 min) |
Teacher: -Introduces the topic of day and spelling out the learning outcome they will possess after the study. 1. Organizational moment to acquaint students with the · The theme of the lesson · The objectives of the lesson · The criteria of success for the lesson · The plan of events for the lesson
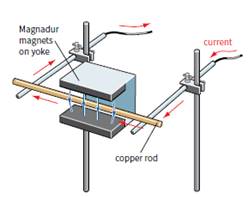
(D) Teacher demonstration. The force on a current in a magnetic field
A current-carrying wire is surrounded by a magnetic field. This magnetic field interacts with an external magnetic field, giving rise to a force on the conductor. The magnets create a fairly uniform magnetic field. As soon as the current in the copper rod is switched on, the rod starts to roll, showing that a force is acting on it. · Why? |
|
|||||
|
Middle 11-16 min
17-25 min
26-27 min |
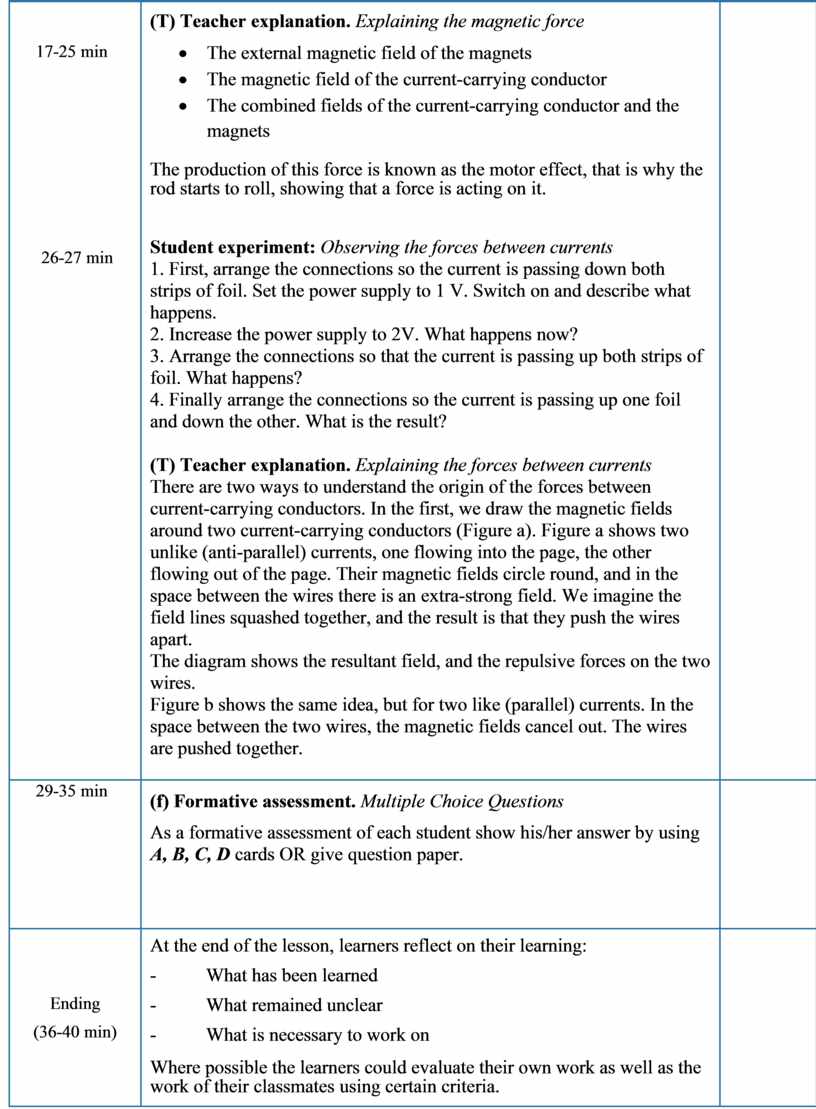
(T) Teacher explanation. Explaining the magnetic force · The external magnetic field of the magnets · The magnetic field of the current-carrying conductor · The combined fields of the current-carrying conductor and the magnets The production of this force is known as the motor effect, that is why the rod starts to roll, showing that a force is acting on it.
Student experiment: Observing the forces between currents 1. First, arrange the connections so the current is passing down both strips of foil. Set the power supply to 1 V. Switch on and describe what happens. 2. Increase the power supply to 2V. What happens now? 3. Arrange the connections so that the current is passing up both strips of foil. What happens? 4. Finally arrange the connections so the current is passing up one foil and down the other. What is the result?
(T) Teacher explanation. Explaining the forces between currents There are two ways to understand the origin of the forces between current-carrying conductors. In the first, we draw the magnetic fields around two current-carrying conductors (Figure a). Figure a shows two unlike (anti-parallel) currents, one flowing into the page, the other flowing out of the page. Their magnetic fields circle round, and in the space between the wires there is an extra-strong field. We imagine the field lines squashed together, and the result is that they push the wires apart. The diagram shows the resultant field, and the repulsive forces on the two wires. Figure b shows the same idea, but for two like (parallel) currents. In the space between the two wires, the magnetic fields cancel out. The wires are pushed together.
|
|
|||||
|
29-35 min
|
(f) Formative assessment. Multiple Choice Questions As a formative assessment of each student show his/her answer by using A, B, C, D cards OR give question paper. |
|
|||||
|
Ending (36-40 min) |
At the end of the lesson, learners reflect on their learning: - What has been learned - What remained unclear - What is necessary to work on Where possible the learners could evaluate their own work as well as the work of their classmates using certain criteria. |
|
|||||
|
Differentiation – how do you plan to give more support? How do you plan to challenge the more able learners? |
Assessment – how are you planning to check students’ learning? |
Health and safety regulations |
|||||
|
· Multiple Intelligences - Visual will watch the video - Analytical take information from the texts
· Differentiation by questioning and dividing in group · Worksheet with varied difficulties |
Assessment – how are you planning to check students’ learning? The output for the worksheet will serve as assessment Questions during the lesson will also serve as formative assessment.
|
Be careful when use the laser-coder |
|||||
|
Reflection
Were the lesson objectives/learning objectives realistic? Did all learners achieve the LO? If not, why? Did my planned differentiation work well? Did I stick to timings? What changes did I make from my plan and why?
|
Use the space below to reflect on your lesson. Answer the most relevant questions from the box on the left about your lesson. |
||||||
|
|
|||||||
|
Summary evaluation
What two things went really well (consider both teaching and learning)? 1:
2:
What two things would have improved the lesson (consider both teaching and learning)? 1:
2:
What have I learned from this lesson about the class or achievements/difficulties of individuals that will inform my next lesson? |
|||||||
Материалы на данной страницы взяты из открытых источников либо размещены пользователем в соответствии с договором-офертой сайта. Вы можете сообщить о нарушении.