Поделиться

|
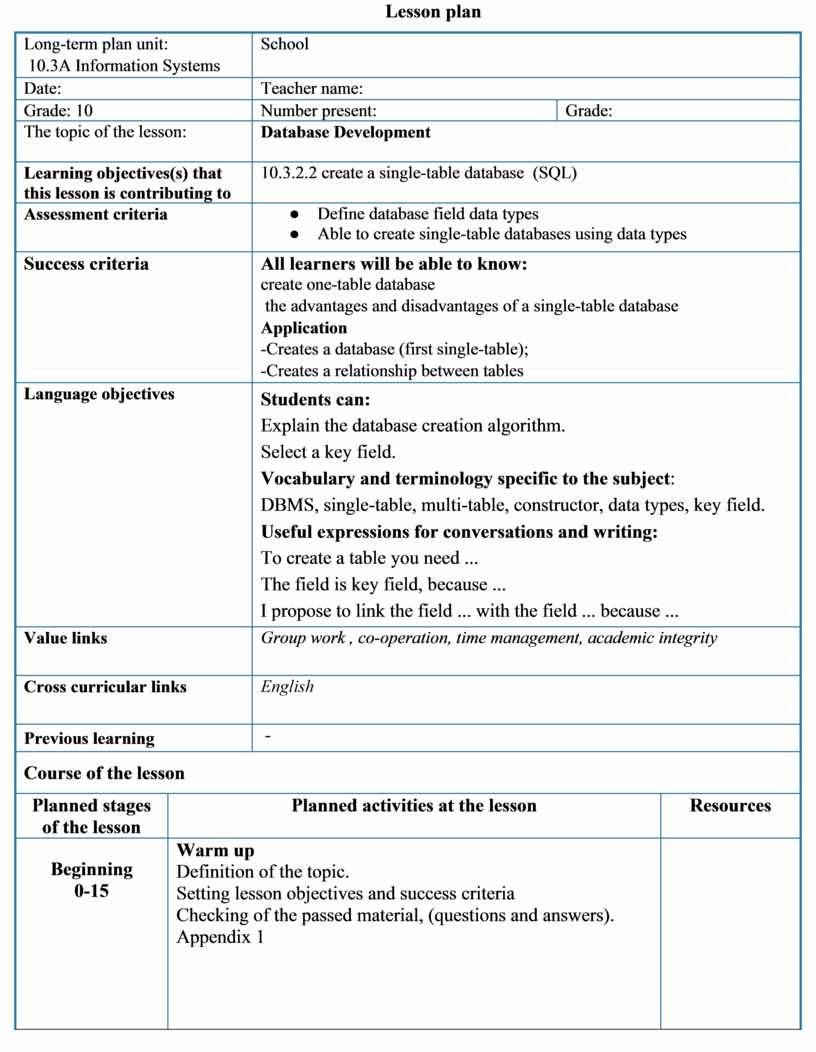
Long-term plan unit: 10.3A Information Systems |
School |
||||||||||
|
Date: |
Teacher name: |
||||||||||
|
Grade: 10 |
Number present: |
Grade: |
|||||||||
|
The topic of the lesson:
|
Database Development |
||||||||||
|
Learning objectives(s) that this lesson is contributing to |
10.3.2.2 create a single-table database (SQL)
|
||||||||||
|
Assessment criteria |
● Define database field data types ● Able to create single-table databases using data types |
||||||||||
|
Success criteria |
All learners will be able to know: create one-table database the advantages and disadvantages of a single-table database Application -Creates a database (first single-table); -Creates a relationship between tables |
||||||||||
|
Language objectives
|
Students can: Explain the database creation algorithm. Select a key field. Vocabulary and terminology specific to the subject: DBMS, single-table, multi-table, constructor, data types, key field. Useful expressions for conversations and writing: To create a table you need ... The field is key field, because ... I propose to link the field ... with the field ... because ... |
||||||||||
|
Value links |
Group work , co-operation, time management, academic integrity |
||||||||||
|
Cross curricular links |
English |
||||||||||
|
Previous learning |
- |
||||||||||
|
Course of the lesson |
|||||||||||
|
Planned stages of the lesson |
Planned activities at the lesson |
Resources |
|||||||||
|
Beginning 0-15
|
Warm up Definition of the topic. Setting lesson objectives and success criteria Checking of the passed material, (questions and answers). Appendix 1 |
|
|||||||||
|
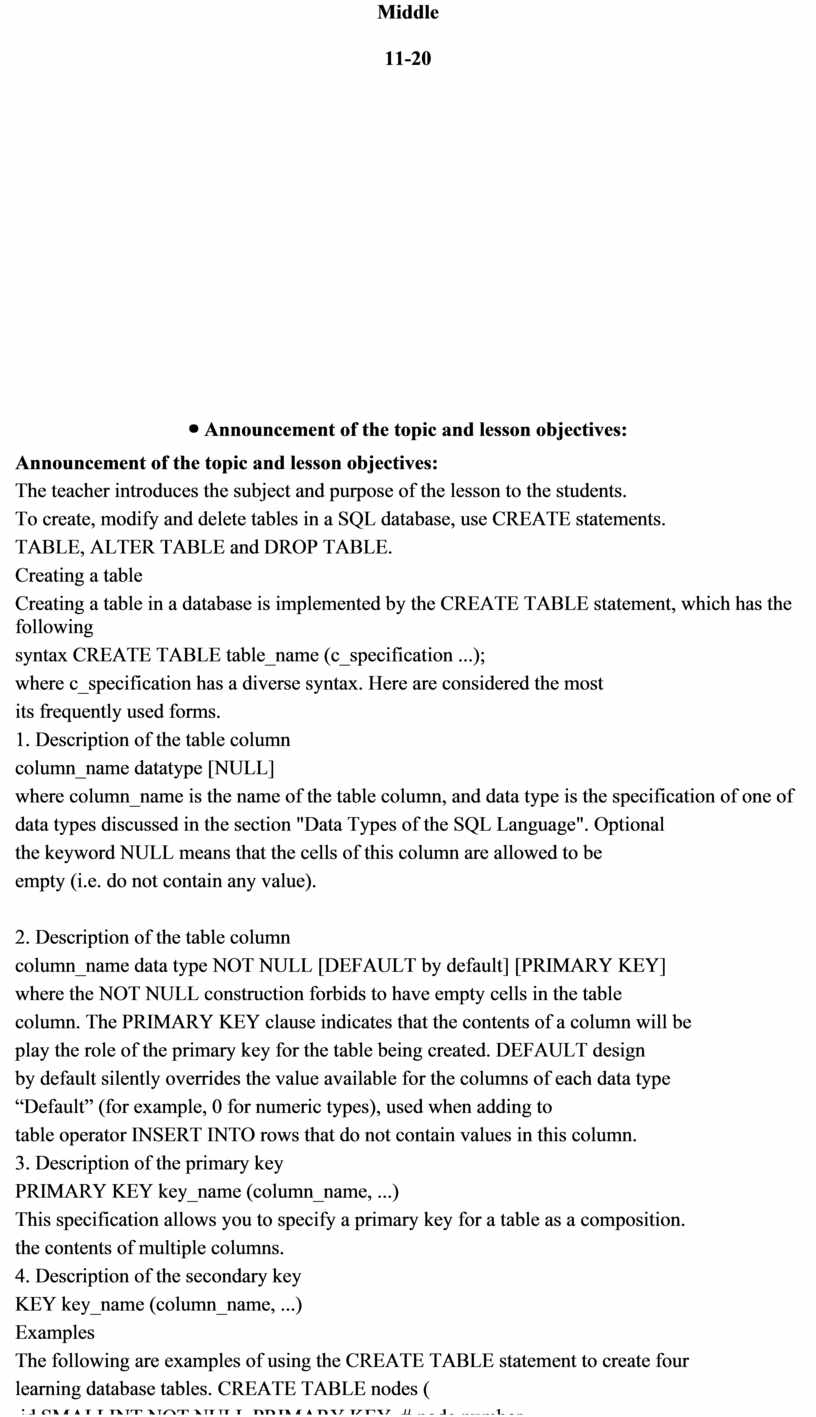
Middle
11-20
|
Announcement of the topic and lesson objectives: The teacher introduces the subject and purpose of the lesson to the students. To create, modify and delete tables in a SQL database, use CREATE statements. TABLE, ALTER TABLE and DROP TABLE. Creating a table Creating a table in a database is implemented by the CREATE TABLE statement, which has the following syntax CREATE TABLE table_name (c_specification ...); where c_specification has a diverse syntax. Here are considered the most its frequently used forms. 1. Description of the table column column_name datatype [NULL] where column_name is the name of the table column, and data type is the specification of one of data types discussed in the section "Data Types of the SQL Language". Optional the keyword NULL means that the cells of this column are allowed to be empty (i.e. do not contain any value).
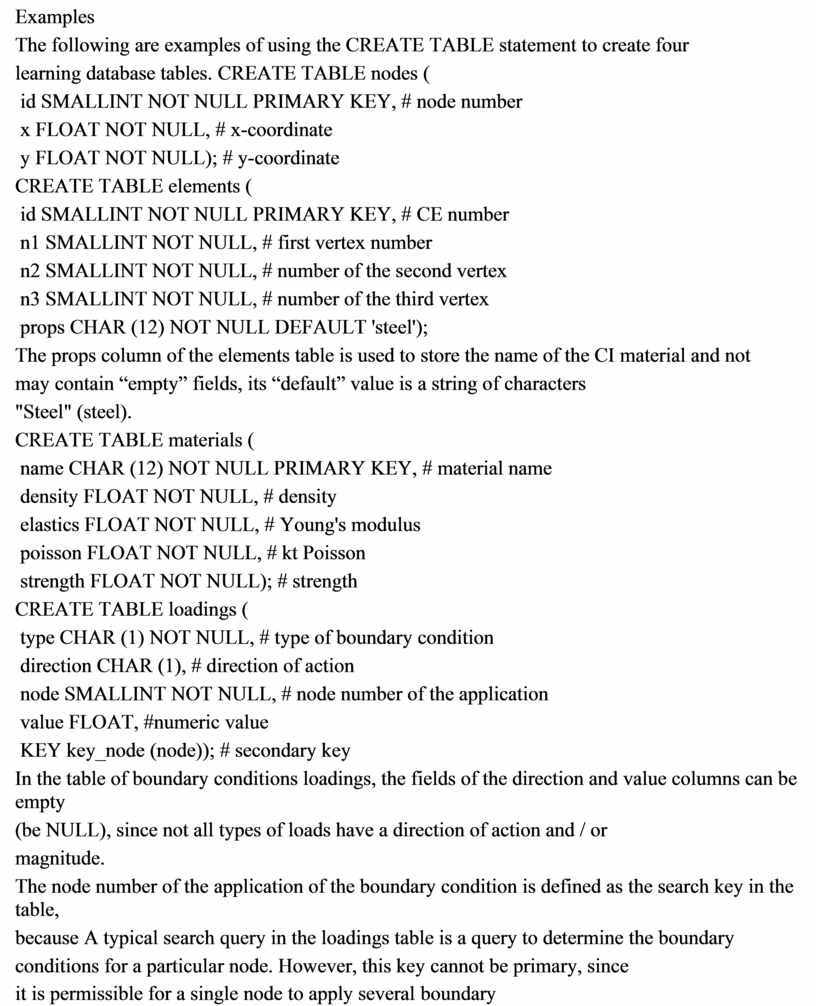
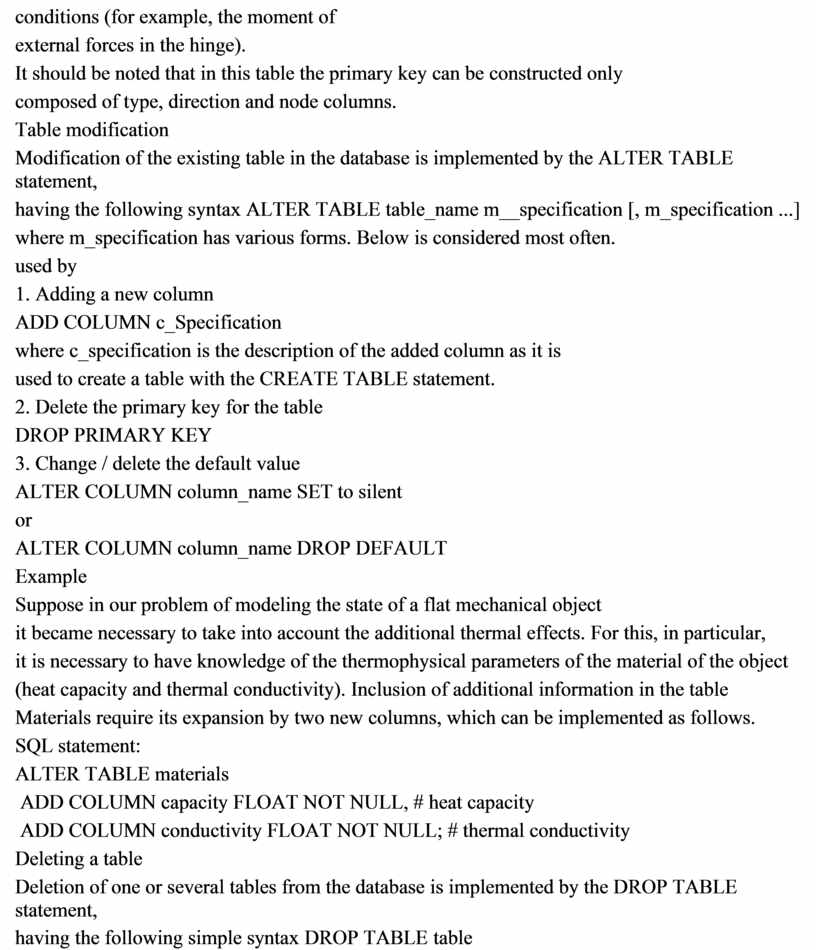
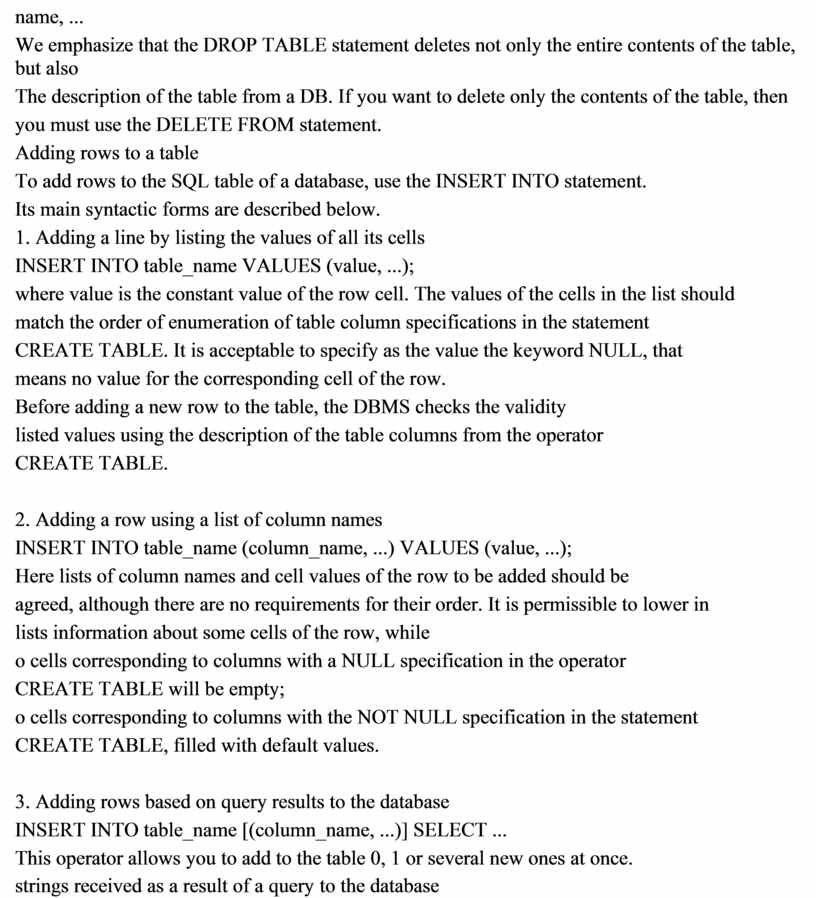
2. Description of the table column column_name data type NOT NULL [DEFAULT by default] [PRIMARY KEY] where the NOT NULL construction forbids to have empty cells in the table column. The PRIMARY KEY clause indicates that the contents of a column will be play the role of the primary key for the table being created. DEFAULT design by default silently overrides the value available for the columns of each data type “Default” (for example, 0 for numeric types), used when adding to table operator INSERT INTO rows that do not contain values in this column. 3. Description of the primary key PRIMARY KEY key_name (column_name, ...) This specification allows you to specify a primary key for a table as a composition. the contents of multiple columns. 4. Description of the secondary key KEY key_name (column_name, ...) Examples The following are examples of using the CREATE TABLE statement to create four learning database tables. CREATE TABLE nodes ( id SMALLINT NOT NULL PRIMARY KEY, # node number x FLOAT NOT NULL, # x-coordinate y FLOAT NOT NULL); # y-coordinate CREATE TABLE elements ( id SMALLINT NOT NULL PRIMARY KEY, # CE number n1 SMALLINT NOT NULL, # first vertex number n2 SMALLINT NOT NULL, # number of the second vertex n3 SMALLINT NOT NULL, # number of the third vertex props CHAR (12) NOT NULL DEFAULT 'steel'); The props column of the elements table is used to store the name of the CI material and not may contain “empty” fields, its “default” value is a string of characters "Steel" (steel). CREATE TABLE materials ( name CHAR (12) NOT NULL PRIMARY KEY, # material name density FLOAT NOT NULL, # density elastics FLOAT NOT NULL, # Young's modulus poisson FLOAT NOT NULL, # kt Poisson strength FLOAT NOT NULL); # strength CREATE TABLE loadings ( type CHAR (1) NOT NULL, # type of boundary condition direction CHAR (1), # direction of action node SMALLINT NOT NULL, # node number of the application value FLOAT, #numeric value KEY key_node (node)); # secondary key In the table of boundary conditions loadings, the fields of the direction and value columns can be empty (be NULL), since not all types of loads have a direction of action and / or magnitude. The node number of the application of the boundary condition is defined as the search key in the table, because A typical search query in the loadings table is a query to determine the boundary conditions for a particular node. However, this key cannot be primary, since it is permissible for a single node to apply several boundary conditions (for example, the moment of external forces in the hinge). It should be noted that in this table the primary key can be constructed only composed of type, direction and node columns. Table modification Modification of the existing table in the database is implemented by the ALTER TABLE statement, having the following syntax ALTER TABLE table_name m__specification [, m_specification ...] where m_specification has various forms. Below is considered most often. used by 1. Adding a new column ADD COLUMN c_Specification where c_specification is the description of the added column as it is used to create a table with the CREATE TABLE statement. 2. Delete the primary key for the table DROP PRIMARY KEY 3. Change / delete the default value ALTER COLUMN column_name SET to silent or ALTER COLUMN column_name DROP DEFAULT Example Suppose in our problem of modeling the state of a flat mechanical object it became necessary to take into account the additional thermal effects. For this, in particular, it is necessary to have knowledge of the thermophysical parameters of the material of the object (heat capacity and thermal conductivity). Inclusion of additional information in the table Materials require its expansion by two new columns, which can be implemented as follows. SQL statement: ALTER TABLE materials ADD COLUMN capacity FLOAT NOT NULL, # heat capacity ADD COLUMN conductivity FLOAT NOT NULL; # thermal conductivity Deleting a table Deletion of one or several tables from the database is implemented by the DROP TABLE statement, having the following simple syntax DROP TABLE table name, ... We emphasize that the DROP TABLE statement deletes not only the entire contents of the table, but also The description of the table from a DB. If you want to delete only the contents of the table, then you must use the DELETE FROM statement. Adding rows to a table To add rows to the SQL table of a database, use the INSERT INTO statement. Its main syntactic forms are described below. 1. Adding a line by listing the values of all its cells INSERT INTO table_name VALUES (value, ...); where value is the constant value of the row cell. The values of the cells in the list should match the order of enumeration of table column specifications in the statement CREATE TABLE. It is acceptable to specify as the value the keyword NULL, that means no value for the corresponding cell of the row. Before adding a new row to the table, the DBMS checks the validity listed values using the description of the table columns from the operator CREATE TABLE.
2. Adding a row using a list of column names INSERT INTO table_name (column_name, ...) VALUES (value, ...); Here lists of column names and cell values of the row to be added should be agreed, although there are no requirements for their order. It is permissible to lower in lists information about some cells of the row, while o cells corresponding to columns with a NULL specification in the operator CREATE TABLE will be empty; o cells corresponding to columns with the NOT NULL specification in the statement CREATE TABLE, filled with default values.
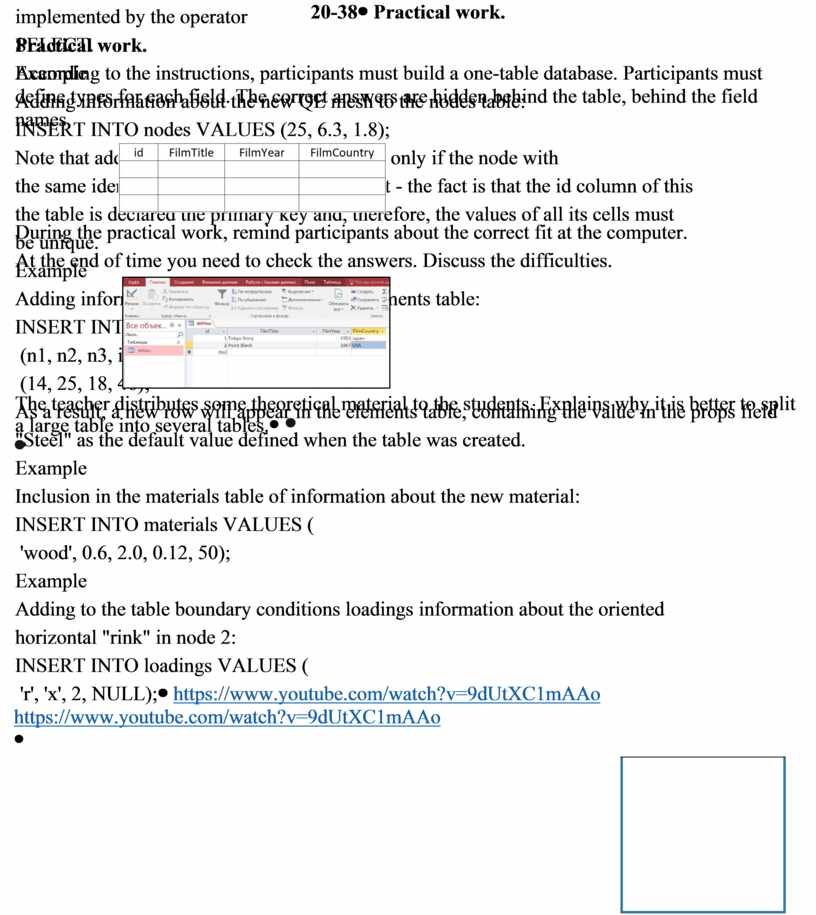
3. Adding rows based on query results to the database INSERT INTO table_name [(column_name, ...)] SELECT ... This operator allows you to add to the table 0, 1 or several new ones at once. strings received as a result of a query to the database implemented by the operator SELECT. Example Adding information about the new QE mesh to the nodes table: INSERT INTO nodes VALUES (25, 6.3, 1.8); Note that adding a new line will be successful only if the node with the same identifier in the nodes table is not yet - the fact is that the id column of this the table is declared the primary key and, therefore, the values of all its cells must be unique. Example Adding information about a new CI to the elements table: INSERT INTO elements (n1, n2, n3, id) VALUES (14, 25, 18, 46); As a result, a new row will appear in the elements table, containing the value in the props field "Steel" as the default value defined when the table was created. Example Inclusion in the materials table of information about the new material: INSERT INTO materials VALUES ( 'wood', 0.6, 2.0, 0.12, 50); Example Adding to the table boundary conditions loadings information about the oriented horizontal "rink" in node 2: INSERT INTO loadings VALUES ( 'r', 'x', 2, NULL); |
https://www.youtube.com/watch?v=9dUtXC1mAAo
|
|||||||||
|
20-38 |
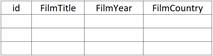
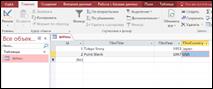
Practical work. According to the instructions, participants must build a one-table database. Participants must define types for each field. The correct answers are hidden behind the table, behind the field names.
During the practical work, remind participants about the correct fit at the computer. At the end of time you need to check the answers. Discuss the difficulties.
The teacher distributes some theoretical material to the students. Explains why it is better to split a large table into several tables. |
|
|||||||||
|
End 38-40 |
Reflection Plus+ minus-interesting." This exercise can be done both verbally and in writing, depending on the time available. For written execution, it is proposed to fill in a table of three columns. In column “P” - “plus” - everything that was liked in the lesson is recorded, information and forms of work that caused positive emotions, or, according to the student, may be useful for him to achieve some goals. In the “M” column - “minus” - everything that was not pleasant in the lesson is recorded, it seemed boring, disliked, remained incomprehensible, or information that, according to the student, was not necessary for him, was useless. In the column "I" - "interesting" - students enter all the curious facts that they learned in class, what else they would like to know about this problem, questions to the teacher. Plus + Minus - Interesting |
board |
|||||||||
|
Differentiation – how do you plan to give more support? How do you plan to challenge the more able learners? |
Assessment – how are you planning to check students’ learning? |
Health and safety regulations |
|||||||||
|
Additional support. Work in pairs / groups - support for classmates. Help the teacher, if required. More capable learners can demonstrate aspects of their decisions that seem interesting / more complex to the other learners. |
Answers questions and a session of answers. Use questions when completing a task. Use survey questions to understand the results / success of learners at each stage of the lesson. |
Remind of some safety rules when working with computer equipment, for example, that you must be careful when installing the screen, keyboard and mouse; beware of wires, as they pose a threat to movement. |
|||||||||
Скачано с www.znanio.ru
Материалы на данной страницы взяты из открытых источников либо размещены пользователем в соответствии с договором-офертой сайта. Вы можете сообщить о нарушении.