
Специальность:08.02.01. «Строительство и эксплуатация зданий и сооружений»
Учебная дисциплина: Иностранный язык (английский)
Тип учебного занятия: Комбинированное занятие
Тема: Что такое аддитивные технологии?
Формируемые компетенции:
1. ОК 1. Понимать сущность и социальную значимость своей будущей профессии, проявлять к ней устойчивый интерес;
2. ОК 5. Осуществлять поиск, анализ и оценку информации, необходимой для постановки и решения профессиональных задач, профессионального и личностного развития.
3. ОК 6. Работать в коллективе и команде, обеспечивать ее сплочение, эффективно общаться с коллегами, руководством, потребителями.
Цели учебного занятия:
· Образовательная цель - закрепление и систематизация знаний профессиональной лексики по теме урока, развитие речевых умений, навыков чтения и понимания профессионально ориентированных текстов, аудирования
· Развивающая цель – развитие логического мышления, умения обобщать и систематизировать знания; развитие у студентов умения объяснять, сравнивать, делать выводы
· Воспитательная цель – формирование коммуникативной культуры, навыков социального общения через активизацию понятий, связанных с профилем специальности.
По результатам занятия студент должен знать: профессиональную лексику по теме «Типы фундаментов», порядок слов в английском распространенном предложении.
По результатам занятия студент должен уметь: систематизировать профессиональную лексику, называть части зданий и типы фундаментов, читать и понимать тексты профессиональной направленности.
Организация деятельности студентов –индивидуальная
Межпредметные связи –. «Проектирование зданий и сооружений» (архитектура, строительные конструкции)
Методы обучения:
- Репродуктивный – ответ на поставленные вопросы
- Продуктивный – группировка профессиональной лексики, составление слов и предложений по теме урока
- Частично-поисковый – самостоятельная работа студентов с учебным материалом, презентациями, поиск оптимального решения поставленной проблемы.
Технические средства обучения: электронные образовательные ресурсы, презентация по теме
1. Речевая подготовка:
Three-dimensional printing, also known as additive manufacturing, harnesses the power of digital technologies to create highly customizable objects in a wide range of applications, spanning bioscience, aerospace, construction, automotive manufacturing and the creative industries.
What is Additive Manufacturing (AM)?
The basic principle of Additive Manufacturing technology is that a CAD generated 3D model is used directly to fabricate a three-dimensional object by adding layer-upon-layer of material and fuse them together.
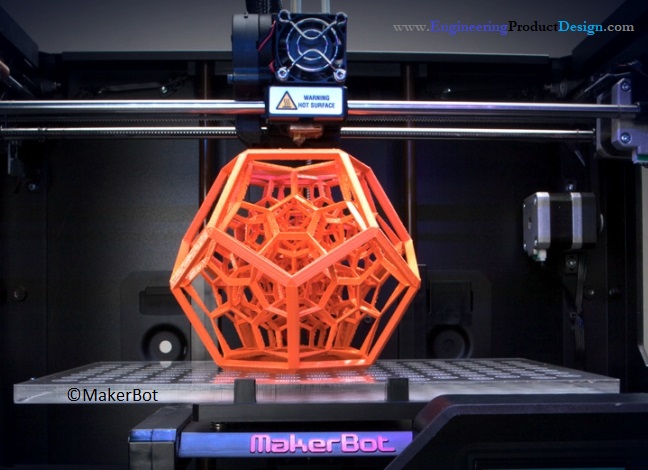
Although initially referred to as Rapid prototyping in a product development context, in recent years these technologies have made giant strides and moved from prototype to production-ready part manufacturing. Term 3D Printing is also widely used for these technologies, and it was coined by MIT for the ink jet printing based AM they invented in the 90s. Hence these terms do not effectively describe more recent technological advancement in the sector.
A technical committee under ASTM international finally defined these processes appropriately as Additive Manufacturing (AM), as the technology builds 3D parts by adding material, as compared subtractive manufacturing.
According to ISO/ASTM 52900-2015, Additive manufacturing is commonly given to the technologies that use successive layers of material to create a three-dimensional object. By using various techniques the printer builds the 3D geometry by constructing a thin 2D plane layer by layer.
2. Этап тренировки.
There are seven main categories of AM technologies viz Vat photopolymerisation, Material Extrusion, Material Jetting, Binder Jetting, Powder bed fusion, Direct energy deposition and Sheet lamination.
3. Этап речевой практики
How Additive Manufacturing Technology works
Although Additive manufacturing processes vary with the different technology it uses to create the 3D parts, each broadly follows these common steps in the process to create the final part.
Step 1 – 3D Model creation
First a 3D model of the object to be printed is created using computer-aided design (CAD) software or a 3D object scanner. Since the part will be exact replica of the 3D model, every detail needs to be right and modelled to the right shape and size and needs to fully define its external geometry.
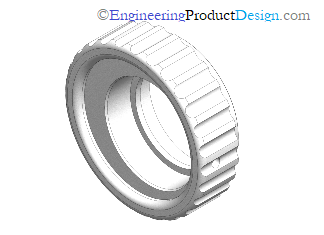 Figure 1. CAD model
Although complex parts can be printed and AM gives you wider design flexibility compared to conventional manufacturing processes, there are still limitation and rules to adhere to when designing to achieve the bet results. The design guides vary according to the additive manufacturing type and material selection. Equipment manufacturers and AM technology service providers have extensive design guides on how to design parts. Refer to the types of AM technology and their manufacturers to find out more.
Step 2 – STL file creation
The CAD file is then converted to a standard AM file format called standard tessellation language (STL), which was developed by 3D Systems in late 80s for use in its Stereolithography (SLA) machines. You can read how STL file is created and how it’s used for 3D printing here.
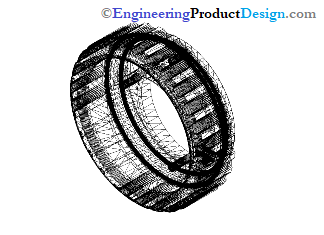 Figure 2. STL file
As the name suggests this will tessellate the 3D shape and slice the part into digital layers. The layer thickness dictates the final quality and depends on the machine and process.
Step 3 – STL file transfer
STL file is then transferred to the printer often using the custom machine software, where model will be manipulated to orientate for printing. At this stage machine software might create its own file with extra information it needs to build the part such as support structure, temperature etc.
Step 4 – Machine set up
Each additive technology and its variants have its own steps and requirements to set up a new printing job. This includes material selection, orientation, printer temperature, support structure, build platform levelling etc. It also involves loading print material, binders and other consumables into the machine.
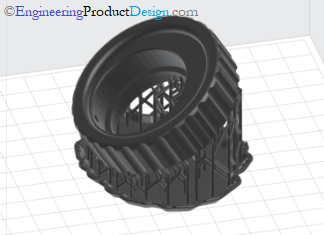 Figure 3. Machine
setup – with support
In order to reduce the cost of printing multiple parts can be set up and waste can also be minimised by choosing the right orientation.
Step 5 – Build
Once the build started, it gradually builds the design one layer at a time. A typical layer is around 0.1mm in thickness but depending on the technology and the material used it can go down to 20 microns.
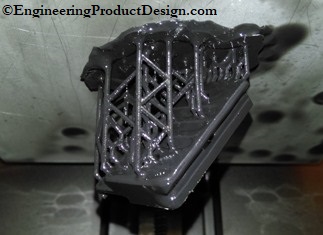 Figure
4. Part in build platform
Depending on the build size, the printing machine, AM technology, material and the printing resolution, this build process could take hours or even days to complete.
Step 6 – Part Removal
After building the part or multiple parts in some cases, it may need a cooling off period before the parts can be removed from the machine. Again depending on the machine and technology, removal could vary from simply peeling off the build platform to wire eroding from the build pate.
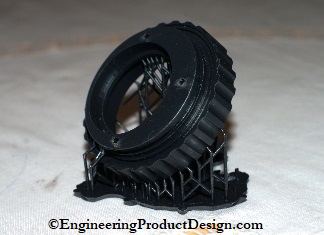 Figure
5. 3D-built part with supports
Step 7 – Post processing
Almost all the additive manufacturing techniques will require some form of post processing. Depending on the AM technology used and the end use of the part, it varies from simply cleaning and polishing to machining and heating treating the part.
4.Заключительный этап. Подведение итогов..Рефлексия.
I can read and understand the information about …
I can listen and understand the information about…
I can write….
I can speak about…
I can ask and answer the questions about
Скачано с www.znanio.ru
Материалы на данной страницы взяты из открытых источников либо размещены пользователем в соответствии с договором-офертой сайта. Вы можете сообщить о нарушении.