Поделиться
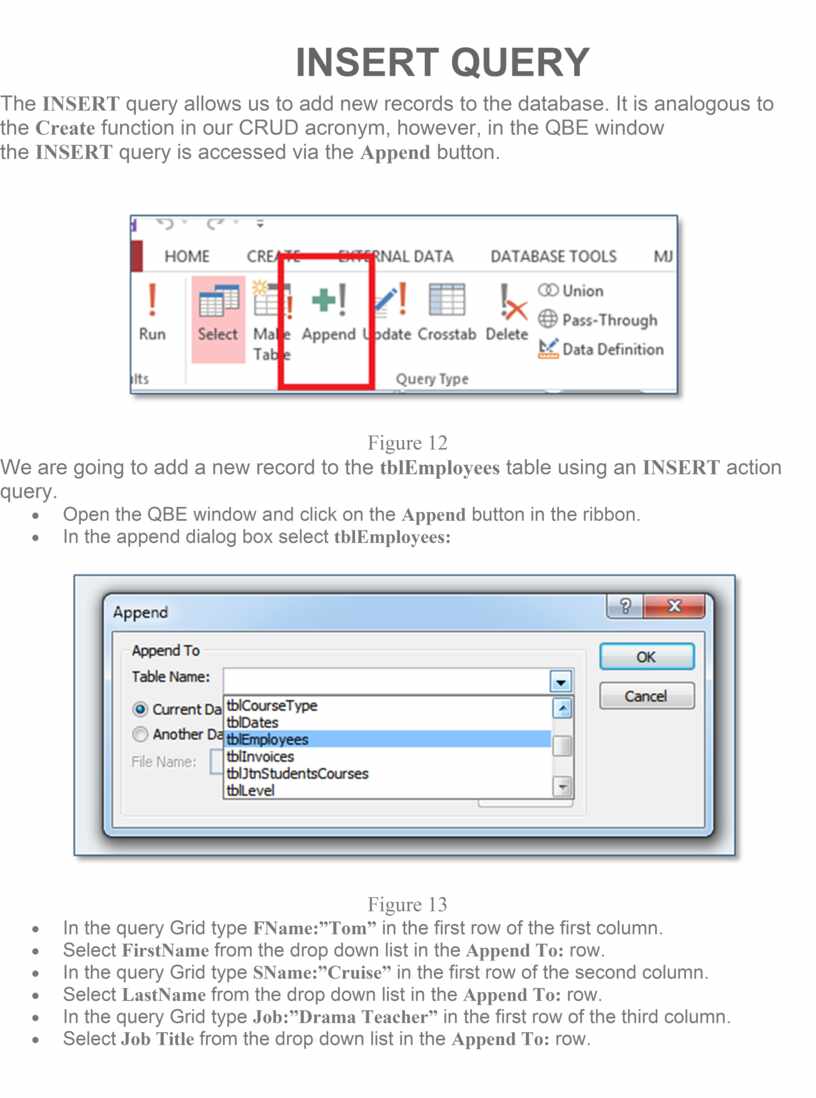
The INSERT query allows us to add new records to the database. It is analogous to the Create function in our CRUD acronym, however, in the QBE window the INSERT query is accessed via the Append button.
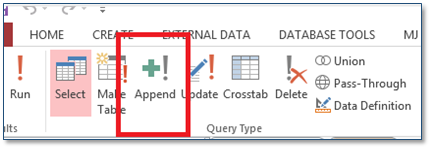
Figure 12
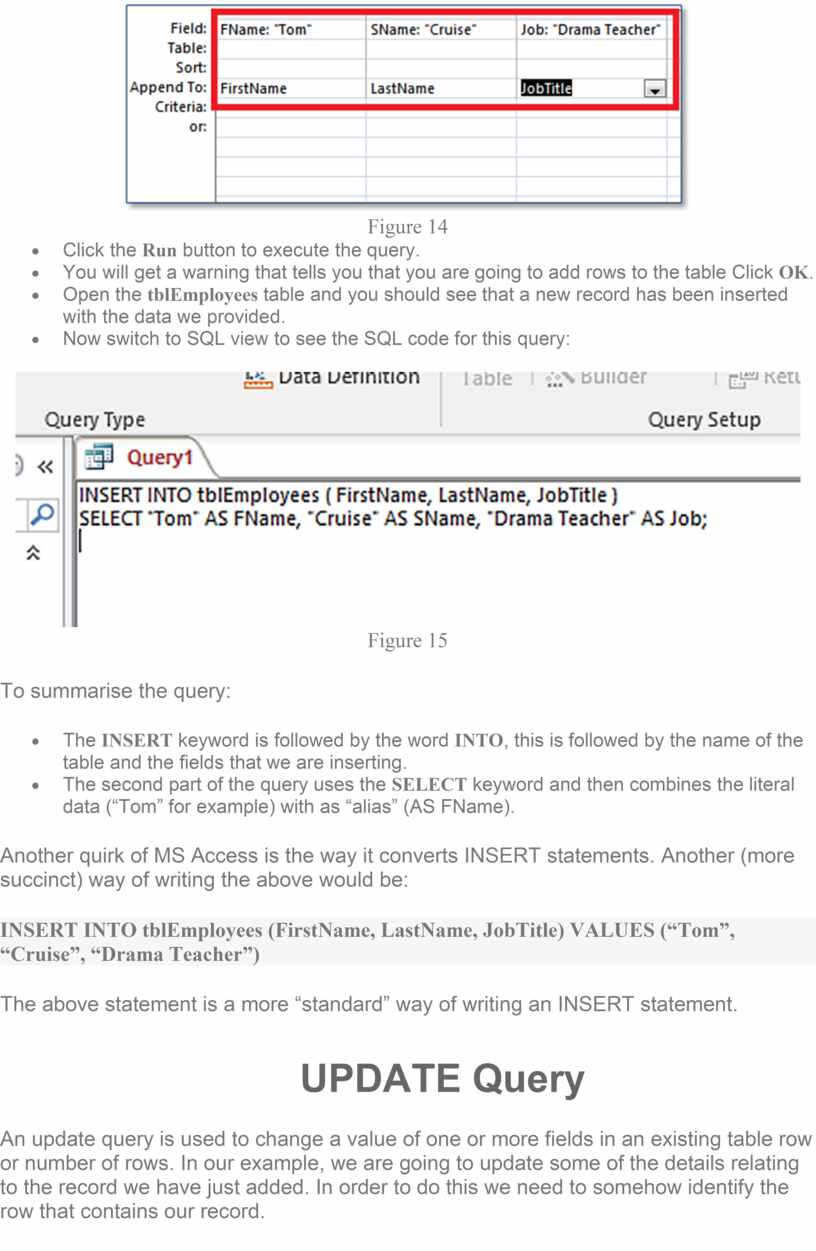
We are going to add a new record to the tblEmployees table using an INSERT action query.
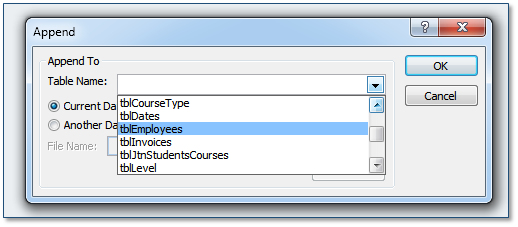
Figure 13
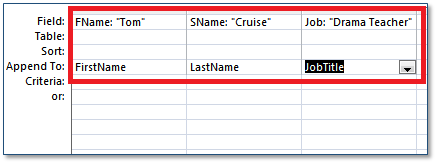
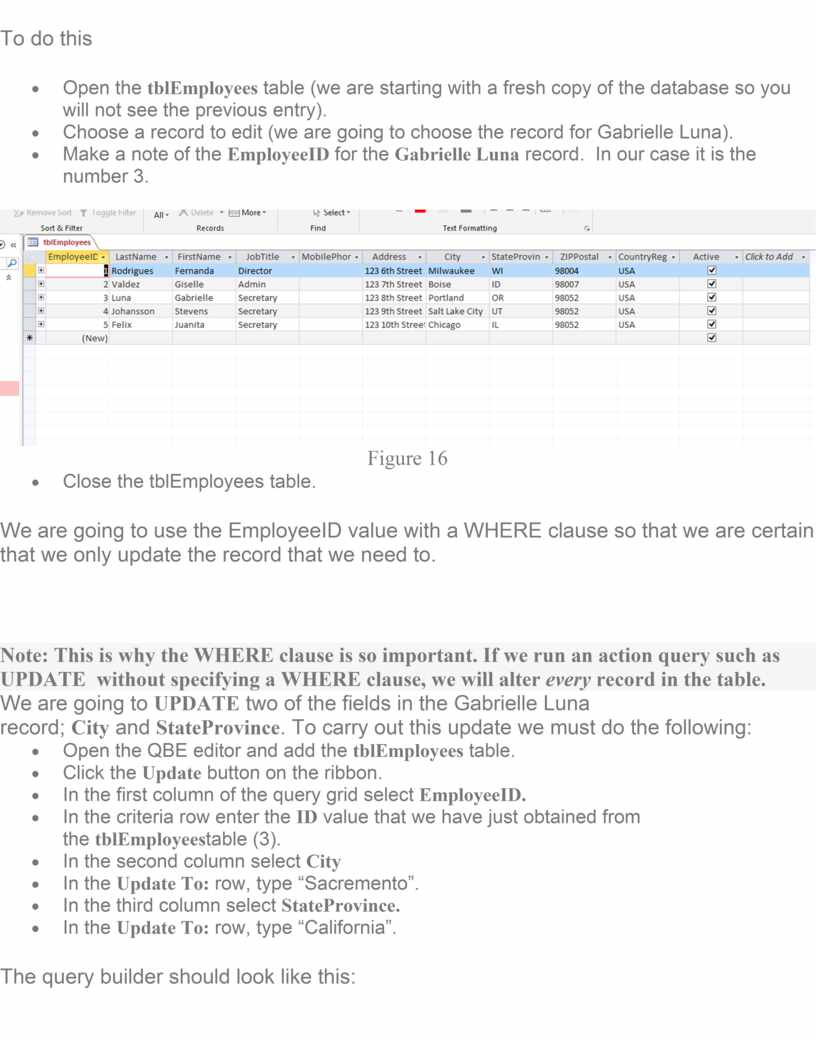
Figure 14
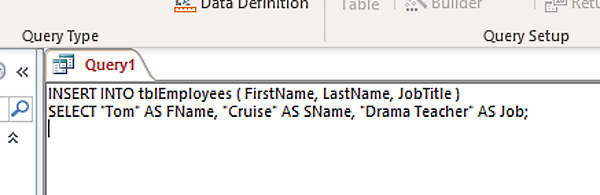
Figure 15
To summarise the query:
Another quirk of MS Access is the way it converts INSERT statements. Another (more succinct) way of writing the above would be:
INSERT INTO tblEmployees (FirstName, LastName, JobTitle) VALUES (“Tom”, “Cruise”, “Drama Teacher”)
The above statement is a more “standard” way of writing an INSERT statement.
An update query is used to change a value of one or more fields in an existing table row or number of rows. In our example, we are going to update some of the details relating to the record we have just added. In order to do this we need to somehow identify the row that contains our record.
To do this
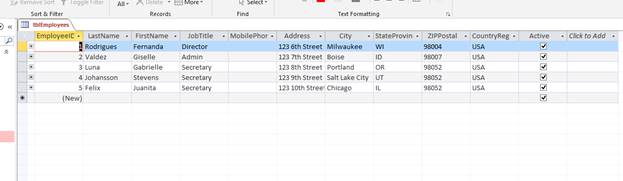
Figure 16
We are going to use the EmployeeID value with a WHERE clause so that we are certain that we only update the record that we need to.
Note: This is why the WHERE clause is so important. If we run an action query such as UPDATE without specifying a WHERE clause, we will alter every record in the table.
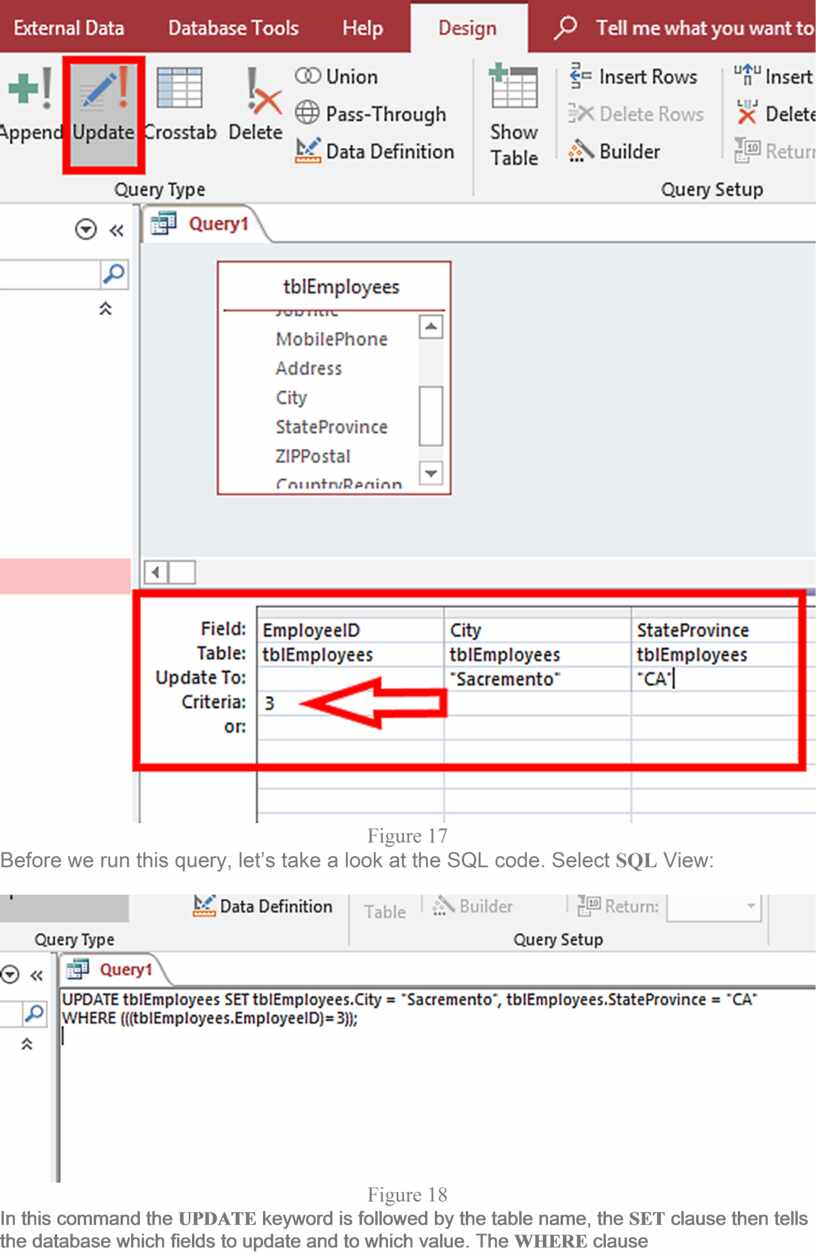
We are going to UPDATE two of the fields in the Gabrielle Luna record; City and StateProvince. To carry out this update we must do the following:
The query builder should look like this:
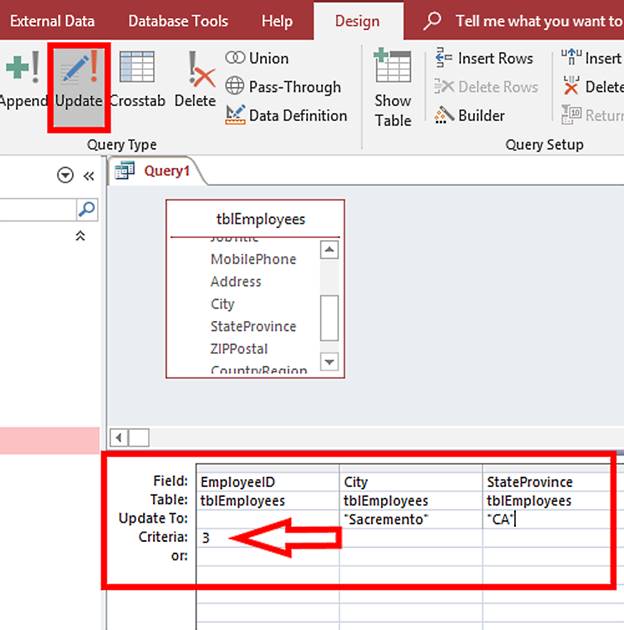
Figure 17
Before we run this query, let’s take a look at the SQL code. Select SQL View:
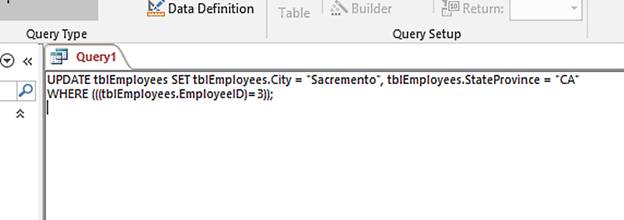
Figure 18
In this command the UPDATE keyword is followed by the table name, the SET clause then tells the database which fields to update and to which value. The WHERE clause comes next and it tells the database to only perform this UPDATE on the row WHERE the EmployeeID = 3.
Run the query and open the tblEmployees table to check that the fields for Gabrielle Luna have been updated.
Note: Again, the parentheses around the WHERE clause are unnecessary.
Скачано с www.znanio.ru

Материалы на данной страницы взяты из открытых источников либо размещены пользователем в соответствии с договором-офертой сайта. Вы можете сообщить о нарушении.